Introduction
Thumbprint cookies have captured the hearts of cookie lovers around the globe with their delightful combination of buttery richness and sweet, fruity centers. These charming treats, distinguished by their signature indented shape, offer endless possibilities for flavor variations and are a staple in many households. Among the myriad of options available, heart-shaped thumbprint cookies stand out, especially for those special occasions that celebrate love and affection, such as Valentine’s Day and anniversaries.
The heart shape not only enhances the aesthetic appeal of these cookies but also adds a layer of sentiment, making them the perfect gift for loved ones. Their vibrant colors and unique shapes are bound to bring smiles to faces, whether they are shared at a gathering or packaged as a heartfelt gift. Beyond their visual charm, these cookies are also incredibly easy to prepare, making them a favorite among both novice and seasoned bakers. With just a few simple ingredients and a straightforward process, you can create a batch of these irresistible bites that encapsulate the joy of baking and sharing.
The Allure of Heart-Shaped Thumbprint Cookies
The history of thumbprint cookies is as rich and varied as the flavors they encompass. Originating in Europe, thumbprint cookies have evolved over time, with each culture adding its unique twist. In some countries, they are known as “biscotti di marmellata,” while others refer to them as “jam drops.” Regardless of the name, the essence remains the same: a tender cookie with a delightful jam-filled center.
The heart shape of these cookies holds a special significance in culinary traditions. Hearts symbolize love and affection, making them an ideal shape for cookies intended for loved ones. The act of baking these cookies is often a labor of love, and sharing them can convey sentiments that words sometimes cannot express. Many bakers have fond memories tied to these cookies, whether it’s a cherished family recipe passed down through generations or an unforgettable baking session with friends. The joy of creating something beautiful and delicious is a universal experience that transcends cultures and generations.
As you embark on this baking adventure, consider how heart-shaped thumbprint cookies can bring warmth and connection to your gatherings. They are not just a treat; they are a way to express your feelings and share joy with others.
Ingredients Overview
To create the perfect heart-shaped thumbprint cookies, you’ll need a selection of simple yet essential ingredients, each playing a crucial role in achieving the right texture and flavor. Here’s a closer look at what you’ll need:
– Unsalted Butter: The foundation of any great cookie, unsalted butter provides richness and flavor. It’s important to use softened butter to ensure that it blends perfectly with the sugars, creating a smooth and creamy dough. The temperature of the butter can significantly impact the texture of the cookies, so take care to let it soften at room temperature before starting.
– Granulated and Brown Sugar: Using a combination of granulated and brown sugar adds depth to the flavor of the cookies. Granulated sugar creates a crisp texture, while brown sugar contributes moisture and a hint of caramel flavor. This blend ensures that your cookies are both tender and slightly chewy, making each bite a delightful experience.
– Egg Yolk: The egg yolk acts as a binding agent, enriching the dough and adding a lovely golden hue. It helps create a tender crumb and contributes to the overall richness of the cookies. For the best results, make sure to incorporate the yolk thoroughly into the dough.
– Vanilla Extract: A splash of pure vanilla extract elevates the flavor profile of the cookies, enhancing the buttery notes and adding a warm, aromatic quality. Quality matters, so opt for pure vanilla extract over imitation for the best flavor.
– All-Purpose Flour: This is the backbone of your cookie dough. All-purpose flour contains a moderate amount of gluten, which helps form the structure of the cookies. Be sure to measure your flour correctly, as too much can lead to dense cookies rather than the tender texture you desire.
– Salt: Though it may seem minor, salt plays a vital role in baking. It balances the sweetness of the sugars and enhances the overall flavor of the cookies. A pinch of salt can make all the difference in elevating the taste profile of your baked goods.
– Fruit Jam: The star of the thumbprint cookie, fruit jam adds a burst of flavor and color to each cookie. You can get creative with your choices—classic options like raspberry or strawberry work beautifully, but feel free to experiment with apricot, blueberry, or even chocolate spread for unique flavor combinations.
– Optional Powdered Sugar: For a finishing touch, a dusting of powdered sugar can add visual appeal and a delicate sweetness to your cookies. It’s not necessary, but it can transform your cookies into an elegant treat fit for any occasion.
Step-by-Step Instructions
Before we dive into the baking process, let’s prepare our workspace. Here are the initial steps to get started on your heart-shaped thumbprint cookies:
1. Prepping the Oven: Begin by preheating your oven to 350°F (175°C). This ensures that your cookies bake evenly. While the oven is warming up, it’s a good time to gather all your ingredients and tools.
2. Preparing the Baking Sheet: Line a baking sheet with parchment paper or a silicone baking mat. This will prevent the cookies from sticking and promote even baking. If you don’t have parchment paper, lightly greasing the baking sheet will work as well.
With these preparations complete, you’re ready to proceed with making the dough, shaping the cookies, and filling them with your favorite jams. Let’s get started on creating these delicious heart-shaped thumbprint cookies that are sure to impress!
Importance of Preheating and Proper Lining for Baking Success
Baking is a science that relies heavily on precise temperatures and techniques, making preheating your oven a crucial first step. By preheating your oven to the desired temperature—usually around 350°F (175°C) for thumbprint cookies—you ensure that your cookies bake evenly and achieve that golden-brown exterior and soft interior. Without this essential step, your cookies might spread too much or bake unevenly, impacting their final texture.
In addition to preheating, proper lining of your baking sheets is equally vital. Using parchment paper not only prevents sticking but also promotes even browning. It creates a barrier between the cookie dough and the hot metal surface, allowing the cookies to bake uniformly without burning. If you don’t have parchment paper, using a silicone baking mat is also a great alternative. Both options ensure that your heart-shaped thumbprint cookies will come out of the oven perfectly intact and ready for the next steps.
Creaming the Butter and Sugars
Once your oven is preheated and your baking sheets are lined, it’s time to start mixing your cookie dough. The process begins with creaming together the butter and sugars. Use room-temperature unsalted butter, as this will help achieve the right texture. The ideal ratio is typically 1 cup of butter to ¾ cup of granulated sugar and ¾ cup of brown sugar, which adds moisture and a hint of caramel flavor to the cookies.
When creaming the butter and sugars, use a stand mixer or a hand mixer on medium speed. This step should take about 2-3 minutes. The goal here is to incorporate air into the mixture, which creates a light, fluffy texture. The light color of the mixture is an indication that you’ve successfully done this. Properly creamed mixtures are essential for cookies that have the right balance of crisp edges and soft centers.
Technique for Achieving the Perfect Texture and Why It Matters
Achieving the perfect cookie texture hinges on the creaming process. When butter and sugar are combined well, it creates tiny air pockets, which expand during baking, leading to a delightful rise in the cookie. If the mixture is not creamed enough, the cookies may turn out dense and heavy. Conversely, over-creaming can lead to cookies that spread too much, resulting in thin, crispy cookies rather than the tender, chewy ones we desire.
To avoid these pitfalls, remember to scrape down the sides of the bowl halfway through the creaming process. This ensures that all ingredients are evenly combined and that no sugar remains stuck to the sides. By paying close attention to the texture of the mixture, you can set the foundation for delicious heart-shaped thumbprint cookies.
Adding the Egg Yolk and Vanilla Extract
Next, it’s time to incorporate the egg yolk and vanilla extract into your mixture. Using one large egg yolk provides richness and moisture that enhances the flavor and texture of the cookies. The addition of 1 teaspoon of pure vanilla extract infuses a warm, aromatic note that complements the sweetness of the sugars.
Mix these ingredients into the creamed butter and sugars until just combined. The emulsification process occurs here, where the fats from the butter and yolk blend with the liquid from the yolk and the sugars. This integration is essential for creating a smooth, cohesive dough. Proper emulsification ensures that the cookies bake evenly and maintain their shape while achieving that desirable soft interior.
Incorporating Flour and Salt
The next step is to gradually incorporate all-purpose flour and a pinch of salt into your dough. Typically, you’ll want to use about 2 cups of all-purpose flour for this recipe, along with ½ teaspoon of salt to enhance the cookie flavor. It’s important to mix these dry ingredients carefully to avoid overdevelopment of gluten, which can lead to tough cookies.
To do this, add the flour mixture in increments, stirring gently with a spatula or on low speed with your mixer until just combined. The dough should be soft and slightly sticky but manageable enough to shape into balls. Overmixing at this stage can lead to a chewy texture instead of the tender cookie we’re aiming for, so be sure to stop mixing as soon as you no longer see dry flour.
Shaping the Cookies
Now that your dough is ready, it’s time to shape the cookies. For uniformity, use a cookie scoop or your hands to form balls approximately 1 inch in diameter. Place them on your prepared baking sheets about 2 inches apart to allow for spreading during baking.
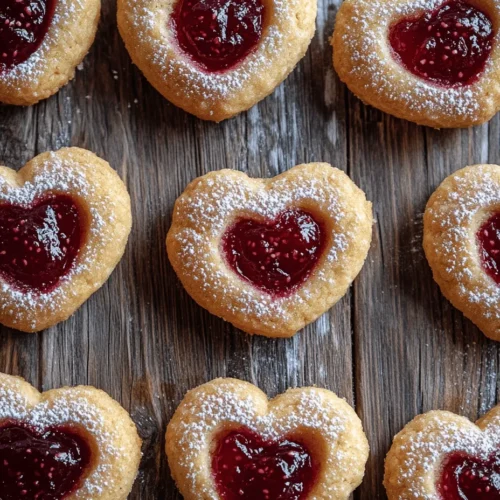
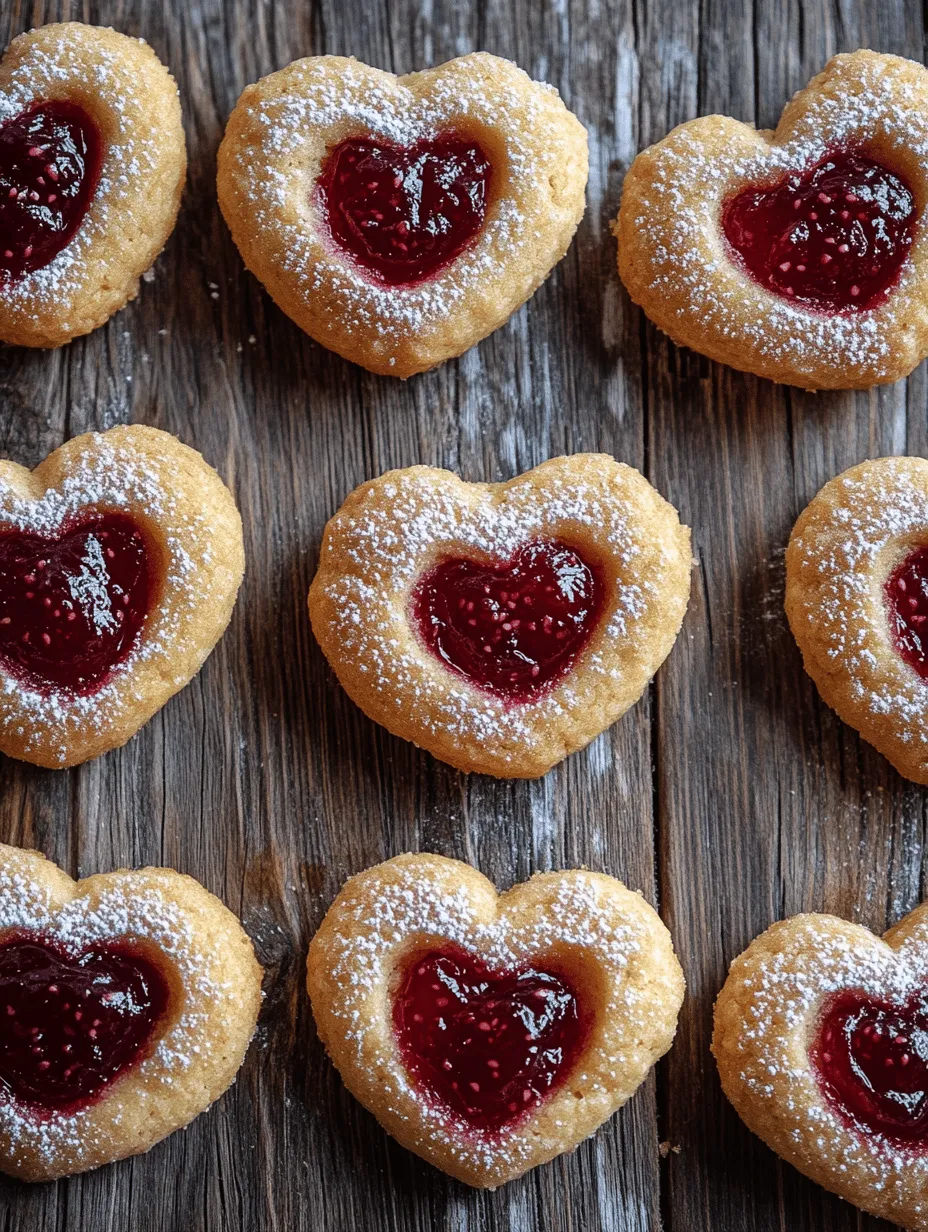
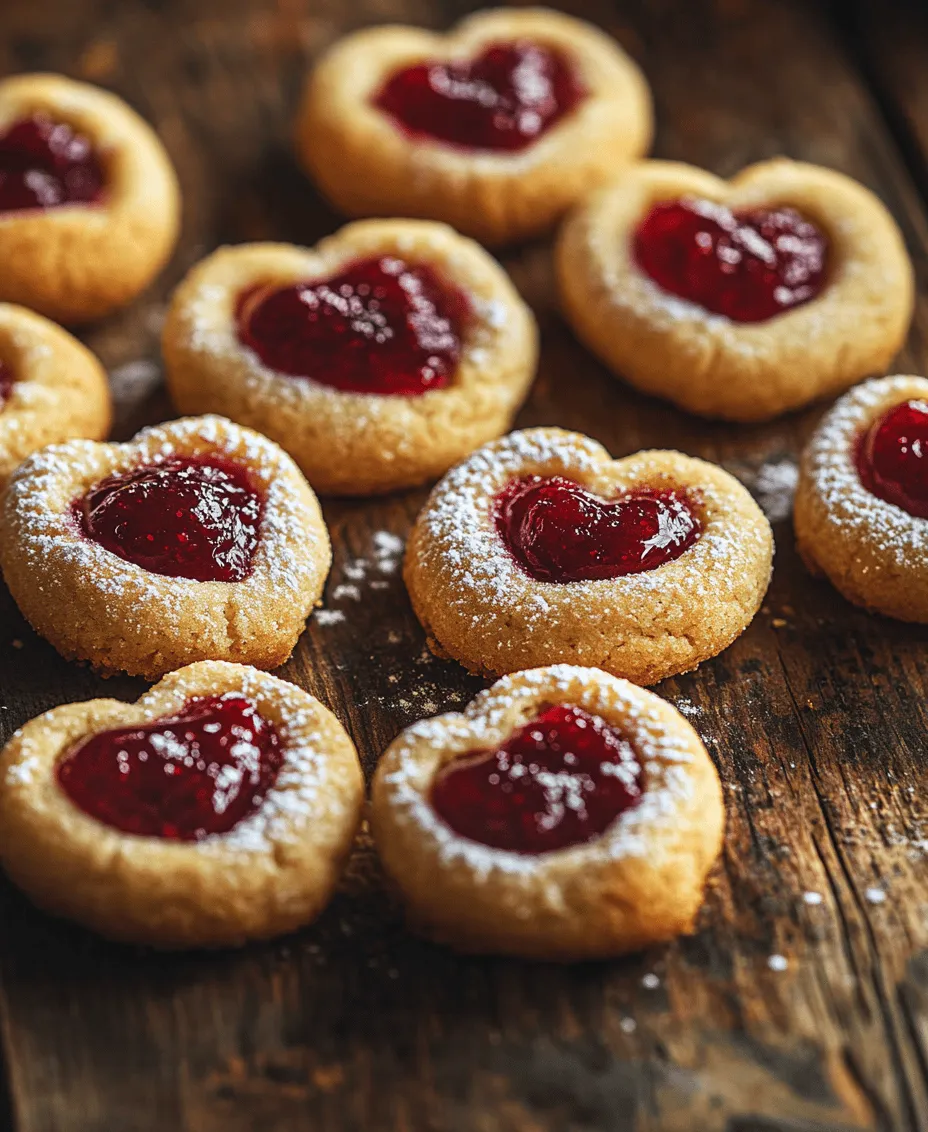
To create the iconic heart shape, you can either gently press the formed ball with your thumb or the back of a measuring spoon to create a small indentation. The thumbprint is a classic technique, but for a heart shape, simply press down and slightly pull the sides outward to create the points of the heart. This technique not only gives the cookies their signature shape but also creates the perfect well for the jam filling.
Filling with Jam
Now comes the fun part—filling those heart-shaped indentations with jam. Choose your favorite fruit preserves or jams, such as raspberry, strawberry, or apricot, for a delightful burst of flavor. Use a teaspoon to fill each indentation, being careful not to overfill. A generous teaspoon is usually enough; if the jam is too high, it may overflow during baking and create a mess.
The key to achieving that perfect jam-to-cookie ratio is to ensure that the filling just reaches the top of the indentation without spilling over the sides. This allows the jam to caramelize slightly while baking, enhancing the flavor and creating a pleasant texture contrast.
Baking and Cooling
With your cookies shaped and filled, it’s time to bake them. Place the baking sheets in the preheated oven and bake for about 10-12 minutes or until the edges are lightly golden. Keep a close eye on them, as oven temperatures can vary, and you want to avoid overbaking.
Once baked, remove the cookies from the oven and allow them to cool on the baking sheets for about 5 minutes before transferring to a wire rack. Cooling is crucial; it allows the cookies to set, ensuring they maintain their shape and texture. Allow them to cool completely before serving or storing.
Presentation and Serving Suggestions
These heart-shaped thumbprint cookies are not just delicious; they are also visually appealing, making them a perfect treat for gatherings, special occasions, or simply as a delightful snack at home. To elevate their presentation, consider dusting the cooled cookies with a light sprinkle of powdered sugar or drizzling them with melted chocolate for an added touch of elegance.
For serving, these cookies pair beautifully with a cup of tea or coffee. The richness of the butter cookies complements the warmth of these beverages, creating a cozy experience. You could also serve them alongside a scoop of vanilla ice cream for a delightful dessert platter.
If you are looking for creative ways to package these cookies as gifts or favors, consider placing them in decorative boxes lined with tissue paper or cellophane bags tied with a colorful ribbon. Personalizing the packaging with a handwritten note or a tag can add a heartfelt touch, making your cookies a thoughtful gift for friends and family.
Conclusion
Baking heart-shaped thumbprint cookies is not just about creating a tasty treat; it’s an opportunity to express love and care for those around you. The joy of mixing, shaping, and filling these cookies can be immensely satisfying, and sharing them brings a sense of warmth and connection.
As you experiment with different jams and personal touches, remember that there are no limits to your creativity. Each batch can be unique, reflecting your preferences or the tastes of those you share them with. Whether enjoyed with a cup of tea, given as gifts, or simply savored on your own, these cookies are a delightful reminder of the love that goes into baking. So roll up your sleeves, preheat that oven, and start creating delicious memories with your heart-shaped thumbprint cookies!