Introduction
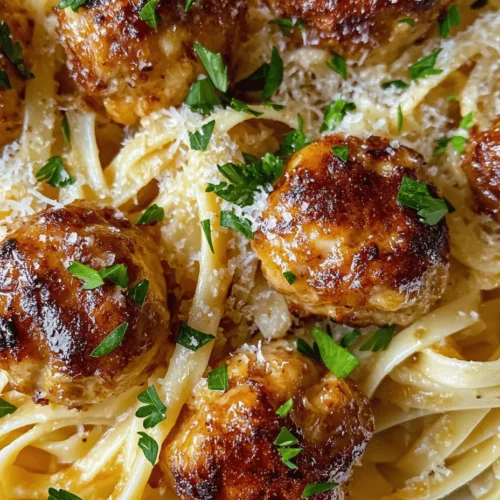
If you are looking for a comforting and satisfying meal that combines mouthwatering flavors and wholesome ingredients, look no further than Garlic Butter Chicken Balls with Creamy Parmesan Pasta. This dish brings together succulent chicken meatballs infused with the rich taste of garlic butter, paired perfectly with a velvety pasta coated in a creamy Parmesan sauce. It’s a delightful combination that is sure to impress at any dinner table, whether it’s a family gathering, a cozy date night, or a casual weekday meal.
The appeal of this dish lies not only in its flavor but also in its versatility. The garlic butter chicken balls can be served as an appetizer or a main course, while the creamy Parmesan pasta adds a touch of indulgence. Both components are easy to prepare and can be made in under an hour, making them perfect for busy weeknights or special occasions alike. Plus, the nourishing ingredients used in this recipe contribute to a well-rounded meal that is both satisfying and nutritious.
In addition to the delicious flavors, this dish is packed with health benefits. Ground chicken provides lean protein, while fresh garlic is known for its immune-boosting properties. The addition of fresh parsley not only enhances the dish’s visual appeal but also offers additional nutrients. With its creamy texture and savory flavors, Garlic Butter Chicken Balls with Creamy Parmesan Pasta is a dish that will leave you craving more.
Understanding the Ingredients
Core Ingredients for Garlic Butter Chicken Balls
1. Ground Chicken: The primary ingredient in garlic butter chicken balls is ground chicken, which serves as a lean source of protein. Unlike beef or pork, ground chicken is lower in calories and fat, making it a healthier choice for those looking to maintain or lose weight. Additionally, it is rich in essential nutrients, including B vitamins that support energy levels and metabolism. By choosing ground chicken, you can enjoy a delicious meal without the guilt.
2. Breadcrumbs: Breadcrumbs play a crucial role in the texture and flavor of the chicken balls. They help bind the ingredients together while providing a light, crispy exterior when cooked. Using seasoned breadcrumbs can also enhance the flavor profile of the chicken balls, adding a subtle herbaceous note that complements the garlic butter. For those looking for a gluten-free option, alternative breadcrumbs made from almond flour or gluten-free bread are great substitutes.
3. Parmesan Cheese: Parmesan cheese is not only a flavor powerhouse but also adds a creamy richness to the chicken balls. This hard cheese is packed with calcium and protein, making it a nutritious addition to the dish. Its sharp, nutty flavor enhances the overall taste of the chicken balls, creating a delicious contrast to the garlic butter. For the best results, consider using freshly grated Parmesan, as it melts more evenly and provides superior flavor compared to pre-grated varieties.
4. Garlic: Garlic is the star of this recipe, infusing the chicken balls with its aromatic properties and distinct flavor. Beyond its culinary appeal, garlic is known for its numerous health benefits, including its ability to boost the immune system and improve heart health. Fresh garlic is best for this recipe, as it delivers a stronger flavor and aroma compared to garlic powder.
5. Fresh Parsley: Fresh parsley is used both for its aesthetic contributions and its nutritional value. This vibrant herb adds a pop of color to the dish while providing vitamins A, C, and K. Moreover, parsley is known for its antioxidant properties and can aid in digestion. Incorporating fresh parsley into the chicken balls elevates the flavor while enhancing the dish’s visual appeal.
Ingredients for the Creamy Parmesan Pasta
1. Fettuccine: Fettuccine is a type of pasta known for its wide, flat shape, which allows it to hold onto rich sauces beautifully. When cooked properly, fettuccine has a lovely chewy texture that pairs well with creamy sauces. For the best results, cook the fettuccine al dente, which means it should be firm to the bite yet tender. This will ensure that it maintains its structure and doesn’t become mushy when combined with the creamy sauce.
2. Heavy Cream: Heavy cream is the key ingredient that delivers the luscious creaminess in this pasta dish. It is high in fat, which helps create a rich and satisfying sauce. While it can be calorie-dense, heavy cream also provides essential fatty acids that are beneficial for overall health. For a lighter version, you can substitute it with half-and-half or a combination of milk and cornstarch, although the texture will differ slightly.
3. Olive Oil: Olive oil is a staple in many kitchens, revered for its health benefits and versatility. It is rich in monounsaturated fats, which are known to promote heart health. Additionally, olive oil contains antioxidants that can help reduce inflammation. In this recipe, olive oil is used to sauté the garlic, enhancing the aroma and flavor of the dish. Opt for extra virgin olive oil for the best flavor and nutritional benefits.
4. Garlic: Once again, garlic takes center stage in the creamy Parmesan pasta, adding depth and flavor to the sauce. Its pungent aroma and distinct taste complement the richness of the cream and cheese, creating a harmonious balance. The health benefits of garlic remain constant, making it a fantastic ingredient to include in both components of this dish.
Nutritional Considerations and Serving Sizes
When preparing Garlic Butter Chicken Balls with Creamy Parmesan Pasta, it’s essential to consider portion sizes and nutritional balance. This dish can serve approximately four people, making it ideal for family meals or gatherings. Each serving offers a hearty dose of protein from the chicken, carbohydrates from the pasta, and healthy fats from the olive oil and cream.
In terms of nutritional content, a serving of this dish can provide a well-rounded meal with essential vitamins and minerals. The chicken balls contribute lean protein, while the pasta delivers energy-boosting carbohydrates. The garlic and parsley add a wealth of nutrients, making this dish not only delicious but also nourishing.
Step-by-Step Guide to Preparing Garlic Butter Chicken Balls
Now that you understand the ingredients and their benefits, let’s delve into the step-by-step process of preparing the garlic butter chicken balls. This straightforward approach ensures that even novice cooks can achieve delicious results.
Step 1: Gather Your Ingredients
Before you start cooking, gather all your ingredients. You will need:
– 1 pound ground chicken
– 1 cup breadcrumbs
– 1/2 cup grated Parmesan cheese
– 4 cloves garlic, minced
– 1/4 cup fresh parsley, finely chopped
– 1 large egg
– 1/4 teaspoon black pepper
– 1/4 teaspoon salt
– 1/4 cup unsalted butter for the garlic butter sauce
Step 2: Prepare the Mixture
In a large mixing bowl, combine the ground chicken, breadcrumbs, grated Parmesan cheese, minced garlic, chopped parsley, egg, salt, and black pepper. Use your hands or a spoon to mix the ingredients until they are well combined. Be careful not to overmix, as this can lead to tough chicken balls.
Step 3: Form the Chicken Balls
Once the mixture is thoroughly combined, it’s time to shape the chicken balls. Using your hands, take a small portion of the mixture and roll it into a ball about the size of a golf ball. Place the formed balls on a baking sheet lined with parchment paper to prevent sticking. Repeat the process until all the mixture has been shaped into balls.
Step 4: Cook the Chicken Balls
In a large skillet, melt the unsalted butter over medium heat. Once the butter is melted and bubbling, add the chicken balls to the skillet in batches, ensuring not to overcrowd the pan. Cook the chicken balls for approximately 5-7 minutes on each side, or until they are golden brown and cooked through. You may need to adjust the heat to prevent burning, so keep an eye on them as they cook.
Step 5: Make the Garlic Butter Sauce
While the chicken balls are cooking, you can prepare the garlic butter sauce. In the same skillet after removing the chicken balls, add a little more butter if needed, along with minced garlic. Sauté the garlic for about 1-2 minutes until fragrant, being careful not to burn it. Once the garlic is fragrant, remove the skillet from the heat.
Step 6: Combine
Once the chicken balls are cooked, return them to the skillet with the garlic butter sauce, gently tossing to coat them in the flavorful sauce. This will add an extra layer of richness and flavor to the chicken balls.
With these steps complete, you are well on your way to creating a delightful meal that is sure to impress. Stay tuned for the next part of the article, where we will dive into the preparation of the creamy parmesan pasta that accompanies these delicious garlic butter chicken balls.
Preheating the Oven: Importance of Temperature Control
Before diving into the preparation of your Garlic Butter Chicken Balls with Creamy Parmesan Pasta, it is crucial to preheat your oven. Preheating ensures that the chicken balls cook evenly, providing that golden, crispy exterior while maintaining moisture inside. The ideal temperature for baking chicken balls is 400°F (200°C). This temperature allows the chicken to cook through while promoting caramelization, enhancing the overall flavor profile. Allow your oven at least 15 minutes to reach the desired temperature before placing the chicken balls inside; this step is vital for achieving the best results.
Mixing the Ingredients: Tips for Achieving the Right Consistency
To achieve moist and flavorful chicken balls, it’s essential to mix the ingredients properly. Begin by combining ground chicken, breadcrumbs, minced garlic, chopped herbs, Parmesan cheese, and seasoning in a large mixing bowl. Use your hands to thoroughly mix the ingredients, ensuring that the garlic and herbs are evenly distributed throughout the chicken.
A key tip here is to avoid over-mixing; doing so can lead to a dense texture. Aim for a uniform mixture just until the ingredients are combined. To check the consistency, you can form a small test ball and cook it in a skillet for a couple of minutes. This step allows you to adjust seasoning if necessary before committing to the entire batch.
Shaping the Chicken Balls: Techniques for Uniformity and Cooking Evenness
Once your mixture is ready, it’s time to shape the chicken balls. To create uniform balls, use a cookie scoop or your hands to portion out the mixture. Aim for approximately 1.5 inches in diameter for each ball; this size will ensure they cook evenly. Wetting your hands slightly can help prevent the mixture from sticking, making it easier to form perfect balls.
After shaping them, place the chicken balls on a parchment-lined baking sheet. Ensure there is enough space between each ball to allow for even cooking and browning. This technique will help the heat circulate around the chicken, resulting in a beautifully cooked dish.
The Application of Garlic Butter: Enhancing Flavor and Moisture
Garlic butter is the star player when it comes to enhancing the flavor of your chicken balls. To prepare the garlic butter, melt unsalted butter in a small saucepan over low heat. Once melted, add minced garlic and cook until fragrant, about 1-2 minutes. Avoid browning the garlic, as this can lead to bitterness.
Once your chicken balls are shaped and placed on the baking sheet, generously brush the garlic butter over the top of each ball. This step not only infuses the chicken with rich garlic flavor but also adds moisture, preventing the balls from drying out during baking. Reserve a little of the garlic butter for drizzling over the finished dish for an extra kick of flavor.
Baking Process: Ideal Times and Signs of Doneness
With your chicken balls ready and brushed with garlic butter, place them in the preheated oven. Bake for about 20-25 minutes, or until they reach an internal temperature of 165°F (74°C). Keep an eye on them towards the end of the baking time to avoid overcooking. Signs of doneness include a golden-brown exterior and a firm texture when gently pressed.
Once done, remove the chicken balls from the oven and allow them to rest for a few minutes. This resting period helps redistribute the juices, ensuring that each bite remains succulent.
Cooking the Creamy Parmesan Pasta
Preparing the Pasta: Importance of Salting Water and Cooking to Al Dente
While the chicken balls bake, you can prepare the creamy Parmesan pasta. Begin by bringing a large pot of salted water to a boil. Salting the water is essential as it enhances the flavor of the pasta, making it more delicious.
Add your choice of pasta—fettuccine, penne, or even gluten-free options—cooking it according to the package instructions until al dente, which typically takes 8-10 minutes. Al dente pasta offers a slight bite, ensuring it holds up well when combined with the creamy sauce.
Making the Creamy Sauce: Steps to Ensure a Smooth Consistency
To create the creamy sauce, start by melting a tablespoon of butter in a large skillet over medium heat. Add minced garlic and sauté for about 30 seconds until fragrant. Next, pour in heavy cream, stirring continuously to prevent it from scorching. Allow the cream to simmer gently for a few minutes, thickening slightly.
Once the cream has reached a desired consistency, reduce the heat and stir in grated Parmesan cheese, allowing it to melt into the sauce. For a touch of freshness, add a squeeze of lemon juice and a pinch of nutmeg, which will elevate the flavors further. If the sauce appears too thick, you can thin it out with a splash of pasta water or additional cream.
Combining Flavors: Importance of Integrating Pasta with Sauce Evenly
Once the pasta is cooked to perfection, drain it, reserving a cup of pasta water. Add the hot pasta to the creamy sauce in the skillet, tossing gently to coat the pasta evenly. If the sauce is too thick, gradually add reserved pasta water until you achieve the desired creaminess. This step ensures that each strand of pasta is enveloped in the rich sauce, making the dish cohesive and indulgent.
Plating and Serving Suggestions
Presentation Tips: How to Make the Dish Visually Appealing
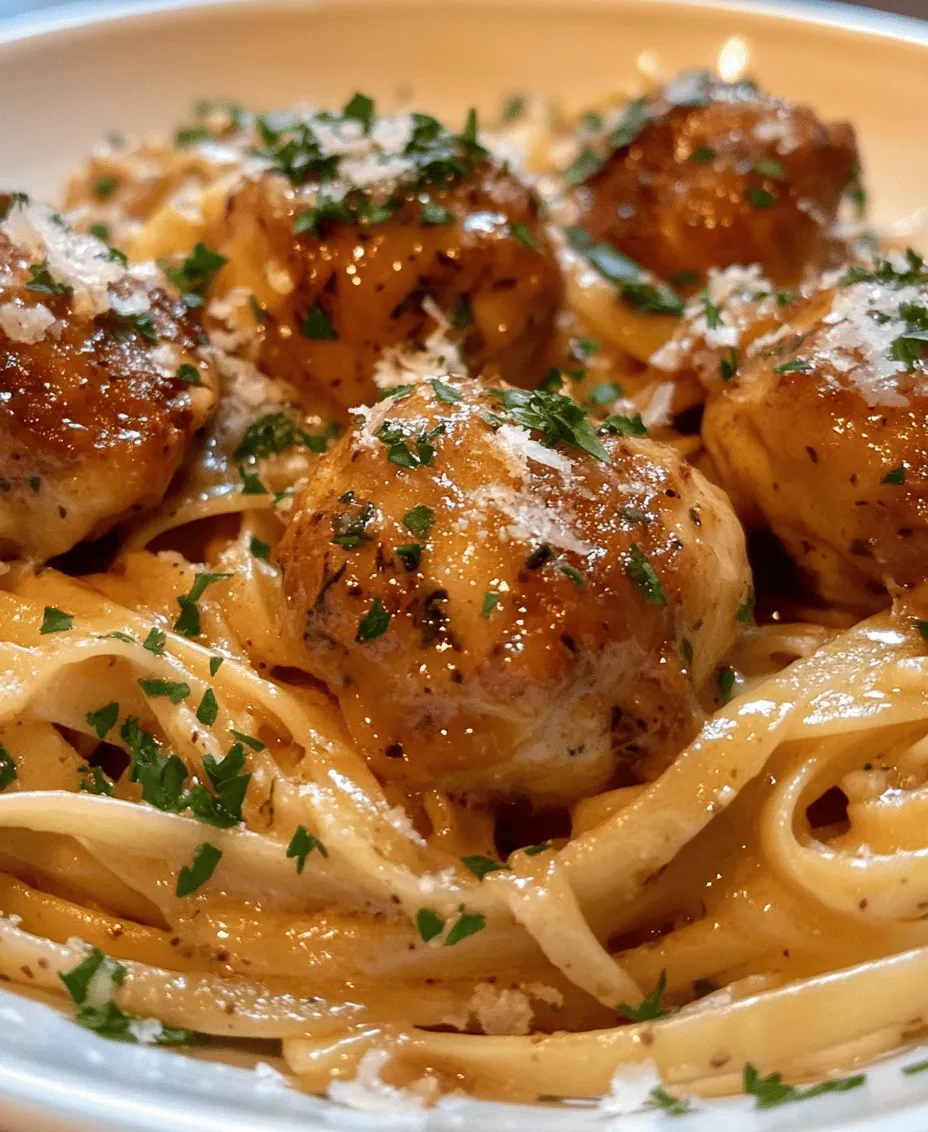
Presentation can elevate your dish from simple to spectacular. Start by plating a generous serving of creamy Parmesan pasta in the center of a large plate or shallow bowl. Nestle several garlic butter chicken balls on top, creating a visually appealing arrangement.
For added flair, you can drizzle the remaining garlic butter from the baking sheet over the dish and create a swirl with the creamy sauce. This not only enhances the visual appeal but also adds flavor.
Garnishing with Fresh Parsley and Parmesan: Enhancing Flavor and Aesthetics
To finish, garnish your dish with freshly chopped parsley and an extra sprinkle of grated Parmesan cheese. The vibrant green of the parsley adds freshness and color, while the cheese contributes additional flavor and texture. You may also consider adding a few cracks of black pepper or a light dusting of red pepper flakes for a touch of heat.
Pairing Suggestions: Ideal Sides or Beverages to Complement the Dish
To complete your meal, consider pairing the Garlic Butter Chicken Balls with Creamy Parmesan Pasta with a simple side salad, perhaps featuring mixed greens, cherry tomatoes, and a light vinaigrette. For beverages, a crisp white wine, such as Sauvignon Blanc or a refreshing sparkling water with lemon, complements the richness of the dish.
Nutritional Information
For each serving of Garlic Butter Chicken Balls with Creamy Parmesan Pasta, you can expect approximately:
– Calories: 650
– Protein: 30g
– Fats: 35g
– Carbohydrates: 50g
This dish is not only satisfying but also a good source of protein. If you are looking to modify the recipe for dietary needs, consider using gluten-free pasta to make it suitable for those with gluten sensitivities. For a lower-carb option, you can substitute traditional pasta with spiralized vegetables like zucchini or spaghetti squash.
Conclusion
In summary, Garlic Butter Chicken Balls with Creamy Parmesan Pasta is a delightful dish that combines rich flavors and satisfying textures. The juicy chicken balls, infused with garlic butter and paired with a smooth, creamy pasta, create a comforting meal perfect for family dinners or special occasions.
This recipe is versatile enough to adapt to various occasions, making it a go-to in your kitchen repertoire. We encourage you to explore this dish in your own kitchen, celebrating the joy of home cooking and the pleasure of sharing delicious meals with loved ones. Enjoy the process and the delightful outcome!