Introduction
Welcome to the delightful world of homemade treats, where indulgence meets simplicity! Today, we will explore a truly mouthwatering recipe for Chocolate Peanut Butter Rice Krispie Cups. These irresistible little cups combine the rich, creamy goodness of peanut butter with the sweet, smooth taste of chocolate, all while incorporating the satisfying crunch of Rice Krispies. Each bite offers a delightful contrast of textures and flavors that is sure to please both kids and adults alike.
This recipe is perfect for various occasions—whether you are throwing a birthday party, hosting a family gathering, or simply enjoying a cozy night in. Not only are these Rice Krispie Cups a hit with all ages, but they are also incredibly easy to prepare, requiring just a handful of ingredients and minimal time in the kitchen. With a few simple steps, you can create a sweet and decadent snack that will leave your friends and family craving more. So, let’s dive into the details of this delectable recipe, ensuring that every bite you take is a moment of pure bliss.
Ingredients Overview
Before we jump into the preparation steps, let’s take a look at the essential components of our Chocolate Peanut Butter Rice Krispie Cups. Understanding these ingredients is crucial for achieving the perfect balance of flavor and texture.
– Rice Krispies Cereal: This crispy cereal serves as the foundation of our cups, providing the delightful crunch that contrasts beautifully with the creamy filling. The lightness of Rice Krispies allows the other flavors to shine, making them a crucial element of this recipe.
– Creamy Peanut Butter: The star of our show! Creamy peanut butter adds richness and a nutty flavor that pairs perfectly with chocolate. It also serves as the main binding agent in our cups, ensuring that all ingredients come together seamlessly.
– Semi-Sweet Chocolate Chips: These little morsels are the pièce de résistance of our Rice Krispie Cups. Their sweet, chocolatey flavor complements the peanut butter beautifully, creating a harmonious blend that is utterly irresistible.
– Unsalted Butter: This ingredient enhances the creaminess of the peanut butter mixture and helps bind all the components together. Using unsalted butter allows you to control the saltiness of the final product, ensuring a perfectly balanced treat.
– Powdered Sugar: To sweeten the peanut butter mixture and achieve a fluffy texture, we incorporate powdered sugar. This fine sugar dissolves easily, giving your cups the right amount of sweetness without any graininess.
– Vanilla Extract: A splash of vanilla extract adds depth of flavor, rounding out the taste profile of our cups. It provides a warm, aromatic essence that enhances the overall indulgence of the treat.
– Salt: While it may seem counterintuitive, a pinch of salt is essential for balancing the sweetness and enhancing the flavors of the ingredients. It brings out the richness of the peanut butter and the chocolate, making each bite even more satisfying.
– Extra Chocolate Chips for Drizzling: This is an optional addition, but it takes our Rice Krispie Cups to the next level. Drizzling melted chocolate on top not only adds a decorative touch but also contributes an extra layer of chocolatey goodness.
Preparation Steps
Now that we have a good understanding of the ingredients, it’s time to move on to the preparation steps for making your Chocolate Peanut Butter Rice Krispie Cups. Follow this clear, step-by-step guide that ensures ease of execution and delicious results.
Preparing the Cupcake Pan
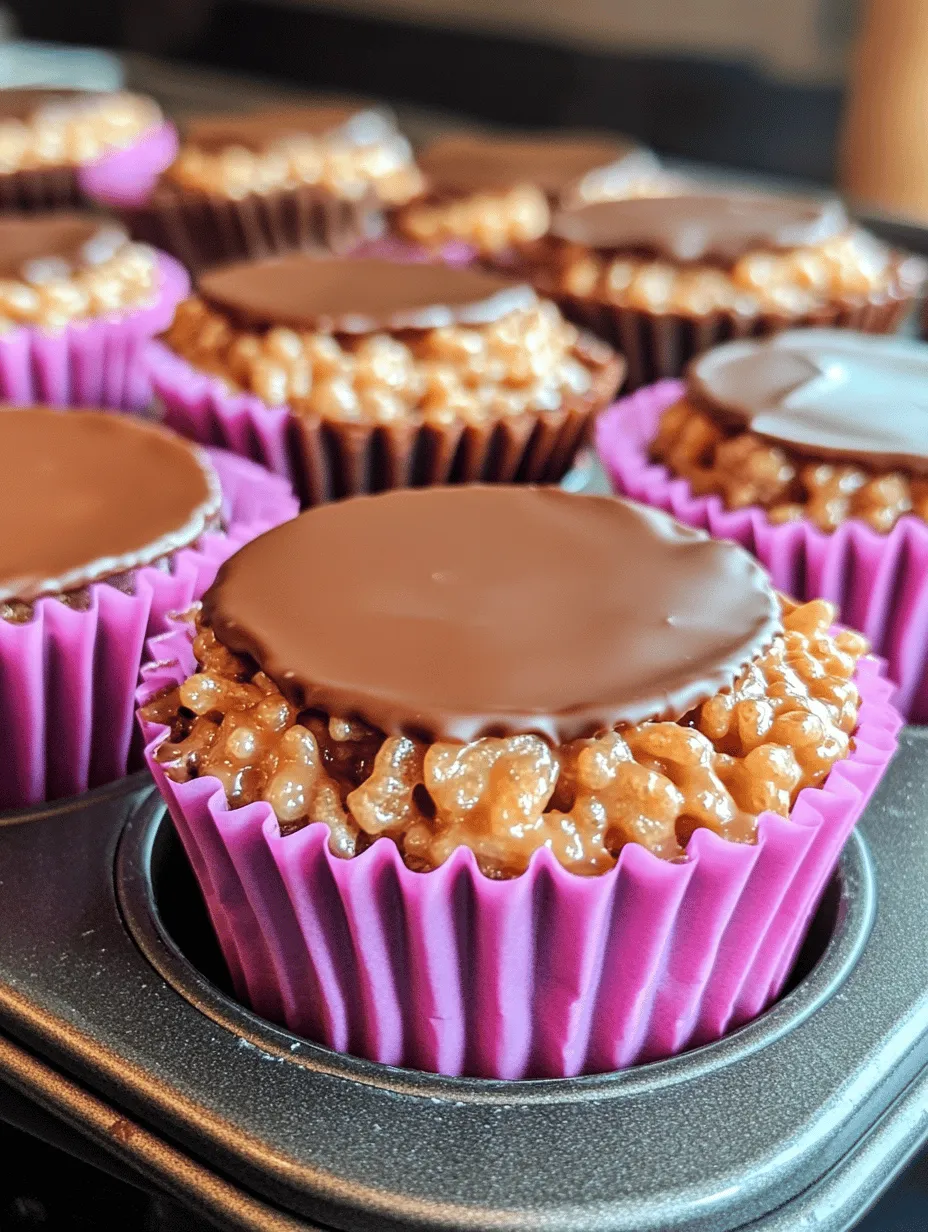
The first step in our preparation process is to set up your muffin tin for hassle-free assembly. Begin by gathering a standard 12-cup muffin tin and lining each cup with paper liners or greasing them lightly with cooking spray. Lining the cups is essential to ensure that your Rice Krispie Cups release easily after they have set, maintaining their perfect shape. If you choose to use paper liners, opt for colorful or decorative ones to make your treats visually appealing.
Once your muffin tin is ready, set it aside and move on to the next steps. This preparation will make the assembly process smoother and help you focus on creating the delicious filling.
Melting the Peanut Butter Mixture
The heart of our Chocolate Peanut Butter Rice Krispie Cups lies in creating a smooth and creamy peanut butter mixture. Begin by combining the creamy peanut butter and unsalted butter in a medium-sized saucepan. It’s essential to melt these ingredients over low heat to prevent burning and ensure a velvety texture. Place the saucepan on the stove and turn the heat to low.
As the butter begins to melt, use a wooden spoon or spatula to stir the mixture continuously. This constant stirring will help integrate the peanut butter and butter, creating a smooth, creamy blend. Be patient during this process; it usually takes just a few minutes to achieve the desired consistency.
Once the peanut butter and butter have melted together, remove the saucepan from the heat. At this point, you will want to add the powdered sugar and vanilla extract to the mixture. Stir until the sugar is fully incorporated, and the mixture is smooth and glossy. This step is crucial because it ensures that the sweetness is evenly distributed throughout the peanut butter filling, giving each cup a perfect taste.
With your peanut butter mixture ready, it’s time to add the Rice Krispies cereal. Gently fold the cereal into the mixture, ensuring that each piece is evenly coated. Be careful not to crush the cereal too much, as you want to maintain that delightful crunch in your finished cups.
Once combined, you will have a thick, sticky mixture that is ready to be spooned into your prepared muffin tin.
Stay tuned for the next part, where we will guide you through the assembly of the Rice Krispie Cups, drizzling chocolate, and some helpful tips to ensure your treats turn out perfectly every time!
Combining with Rice Krispies
Once your creamy peanut butter mixture is perfectly blended, it’s time to introduce the star ingredient: Rice Krispies. The key to achieving that delightful crunch is to fold them in gently. Begin by measuring out 4 cups of Rice Krispies and set them aside. Using a spatula, gradually add the Rice Krispies to the peanut butter mixture. The goal here is to ensure each rice puff is evenly coated without crushing them. Use a gentle folding motion, similar to how you would fold whipped cream into a batter, to maintain their airy texture. This careful combination will yield a crunchy yet cohesive mixture that will hold together beautifully when pressed into the muffin tin.
Pressing into Muffin Tin
Now that your Rice Krispies are well-coated, it’s time to shape them into cups. Line a muffin tin with paper cupcake liners to make removal easier later on. Using a small scoop or your hands, take a portion of the mixture and place it into each liner. The amount should be enough to create a solid base that holds its shape—generally about 2 tablespoons per cup. Start by pressing the mixture down firmly into the bottom of each liner. Then, use your fingers or the back of a spoon to press the mixture up the sides, forming a well in the center for the chocolate filling. Aim for a thickness of about 1/4 inch on the bottom and sides, ensuring there is enough space left for the chocolate topping. A well-formed cup will not only hold its shape during assembly but will also provide a delightful bite when it’s time to indulge.
Preparing the Chocolate Topping
With the Rice Krispie cups molded and ready, it’s time to prepare the luscious chocolate topping. You can melt chocolate using either a stovetop method or a microwave, depending on your preference.
For the stovetop method, fill a saucepan with a couple of inches of water and place it on low heat. Set a heatproof bowl on top of the saucepan, ensuring it doesn’t touch the water (this creates a double boiler effect). Add 1 cup of chocolate chips (semi-sweet or your preferred type) to the bowl and stir gently until melted and smooth.
If you prefer using the microwave, place the chocolate chips in a microwave-safe bowl. Heat them in 30-second intervals, stirring in between, until fully melted. Be cautious not to overheat the chocolate, as it can seize and become unusable. Once melted, the chocolate should be glossy and smooth, ready to be poured into your cups.
Filling the Cups
Now comes the exciting part—filling your Rice Krispie cups with the melted chocolate. Carefully spoon a generous amount of the melted chocolate into each cup, filling them about three-quarters full. Use a small offset spatula or the back of a spoon to smooth the chocolate out evenly across the top. This step is crucial in achieving a polished look and ensuring that every bite has the perfect balance of chocolate and the peanut butter rice mixture. Take your time with this process, as it will enhance the overall presentation of your dessert.
Chilling and Setting
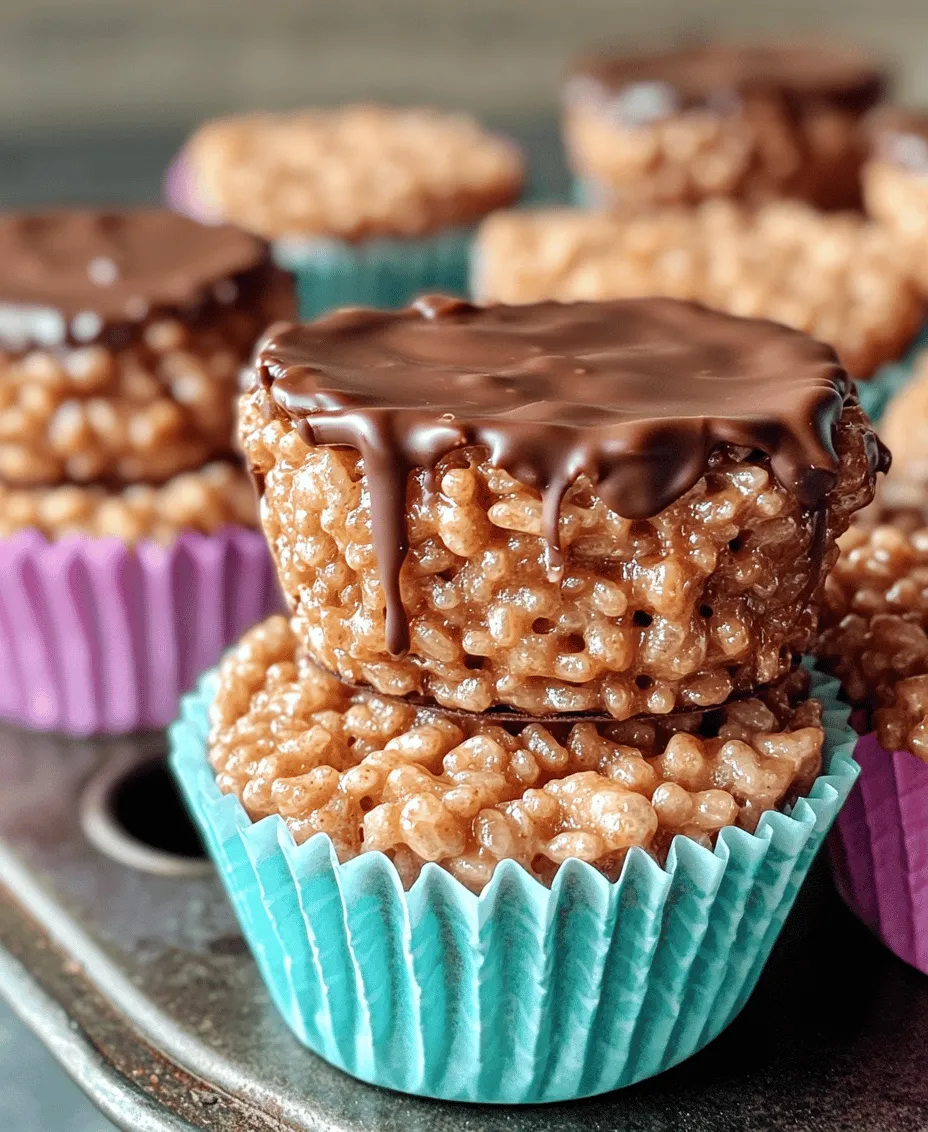
Once all the cups are filled, place the muffin tin in the refrigerator. Chilling your cups is essential for the chocolate to set properly and for the structure to hold. Allow them to chill for at least 30 minutes. This will give the chocolate time to harden, creating a satisfying snap when you take a bite. If you’re in a hurry, you can place them in the freezer for about 10-15 minutes, but keep an eye on them to prevent the chocolate from becoming overly firm.
Optional Drizzle Technique
For an extra touch of elegance, consider drizzling more melted chocolate on top of your cups. This step is entirely optional but adds a beautiful finish. To create a drizzle, melt an additional 1/2 cup of chocolate using your preferred method. Once melted, transfer it to a small zip-top bag, snip off a tiny corner, and drizzle the chocolate over the tops of the cups in a zigzag pattern. This simple technique elevates the presentation and makes your treats look even more enticing.
Serving Suggestions
Presentation matters, especially when it comes to desserts. Your Chocolate Peanut Butter Rice Krispie Cups can be served in various ways to impress your guests. Consider placing them on a decorative platter sprinkled with crushed nuts or mini chocolate chips for added texture. They also look delightful on a tiered cake stand, which can create an eye-catching display at parties or gatherings.
These cups are perfect for numerous occasions—birthdays, holidays, or even as a sweet treat for a movie night. Pair them with a glass of cold milk or a warm cup of coffee for an indulgent experience. If you want to turn them into a fun party favor, consider wrapping each cup in cellophane and tying it with a ribbon for a charming presentation.
Nutritional Information
Understanding the nutritional aspects of your treats can help you make informed choices. Each Chocolate Peanut Butter Rice Krispie Cup contains an approximate caloric value of 140-160 calories, depending on the specific ingredients and portion sizes used. Here’s a quick breakdown of the nutritional information per cup:
– Calories: 140-160
– Total Fat: 8g
– Saturated Fat: 3g
– Cholesterol: 0mg
– Sodium: 40mg
– Total Carbohydrates: 17g
– Dietary Fiber: 1g
– Sugars: 9g
– Protein: 3g
These cups are a delightful treat, and while they are indulgent, they also provide a bit of protein from the peanut butter and a satisfying crunch from the Rice Krispies.
Conclusion
Our Chocolate Peanut Butter Rice Krispie Cups are a delightful combination of flavor, texture, and simplicity. Perfect for any occasion, these treats are sure to become a favorite in your household. With straightforward instructions and accessible ingredients, this recipe invites bakers of all skill levels to enjoy the sweet satisfaction of homemade goodness. Indulge in these charming cups and savor the joy they bring to your table. Whether you’re making them for a special celebration or just as a treat for yourself, these Rice Krispie cups are bound to impress and satisfy. Enjoy every crunchy, chocolatey bite!