Introduction
Ice cream is more than just a dessert; it’s a delightful experience that transcends generations, bringing people together in joyous moments. From summer barbecues to cozy family gatherings, the creamy, sweet treat has a universal appeal that warms the heart and tickles the taste buds. Among the myriad of flavors available, one stands out for its whimsical charm and playful spirit: Cookie Monster Ice Cream. This vibrant blue dessert, inspired by the beloved Sesame Street character, is not only visually striking but also deliciously indulgent, combining the flavors of vanilla, chocolate, and crunchy cookies in every delightful scoop.
Homemade ice cream has a unique way of creating cherished memories. It allows you to personalize flavors, experiment with ingredients, and share the joy of creation with loved ones. The Cookie Monster Ice Cream recipe is a perfect example of how a simple treat can evoke fun and nostalgia. Whether you’re celebrating a birthday, hosting a movie night, or simply looking to treat your family to something special, this ice cream is sure to be a hit. The combination of its fun appearance and delicious taste makes it an irresistible choice for both kids and adults alike.
Understanding Cookie Monster Ice Cream
The inspiration behind Cookie Monster Ice Cream is undoubtedly rooted in the iconic character from Sesame Street. Known for his insatiable love for cookies and his playful antics, Cookie Monster has stolen the hearts of children and adults for decades. This dessert captures that spirit, transforming the essence of a cookie lover’s dream into a creamy, frozen delight.
Flavor-wise, Cookie Monster Ice Cream offers a harmonious blend that excites the palate. The base is a rich and creamy vanilla ice cream, which serves as the perfect canvas for the added flavors. It features crushed chocolate chip cookies and Oreo cookies, adding a delightful crunch and bursts of chocolatey goodness to each bite. The contrasting textures of the creamy ice cream and the crunchy cookie pieces create a delightful experience that is both satisfying and indulgent.
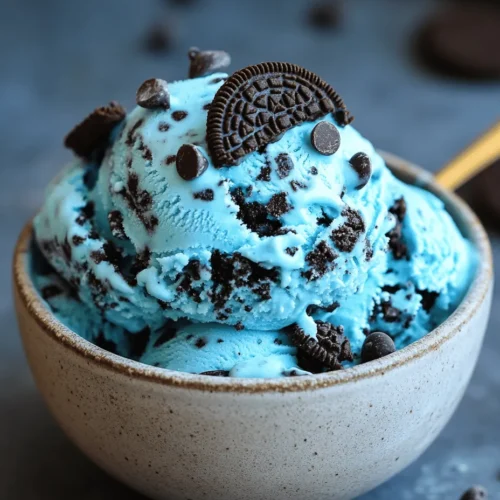
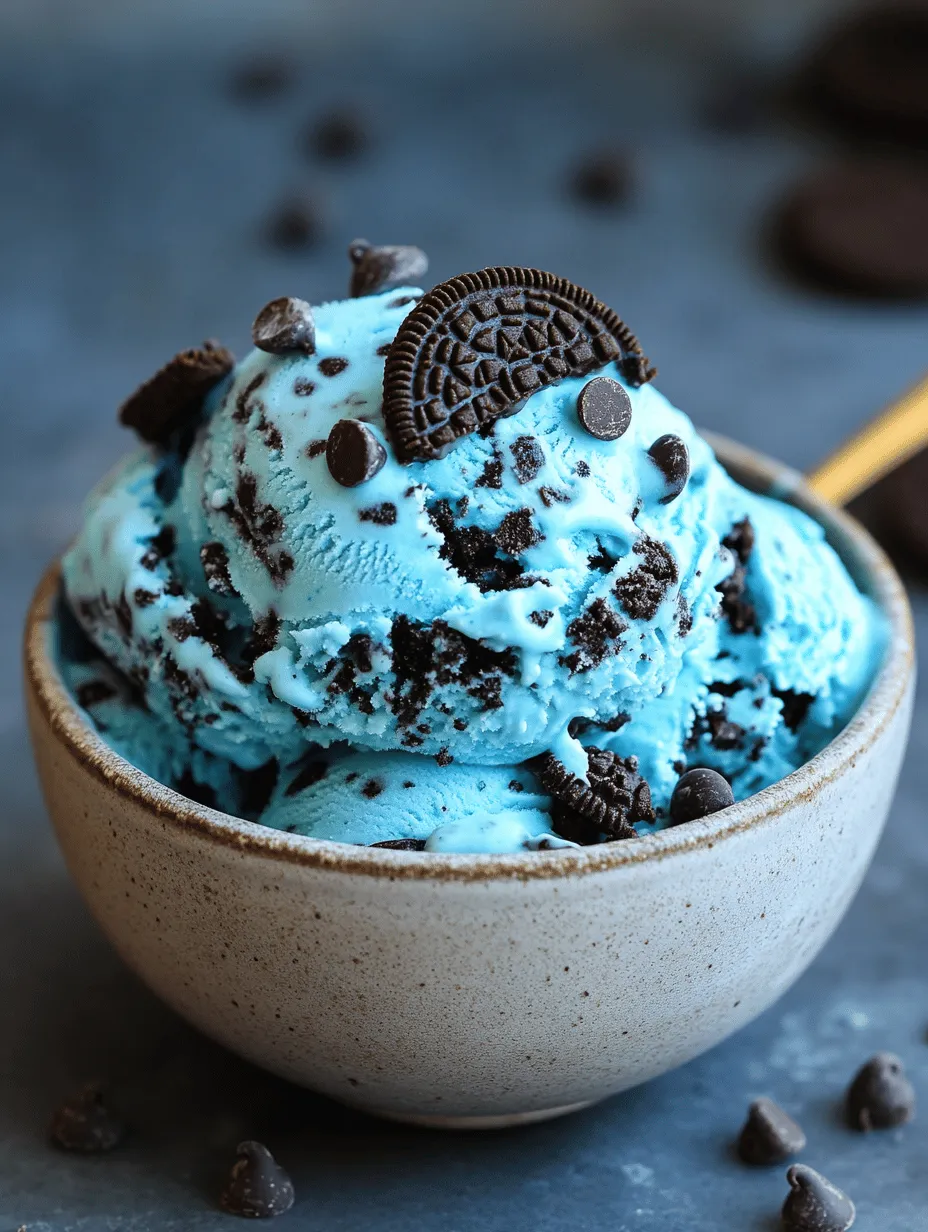
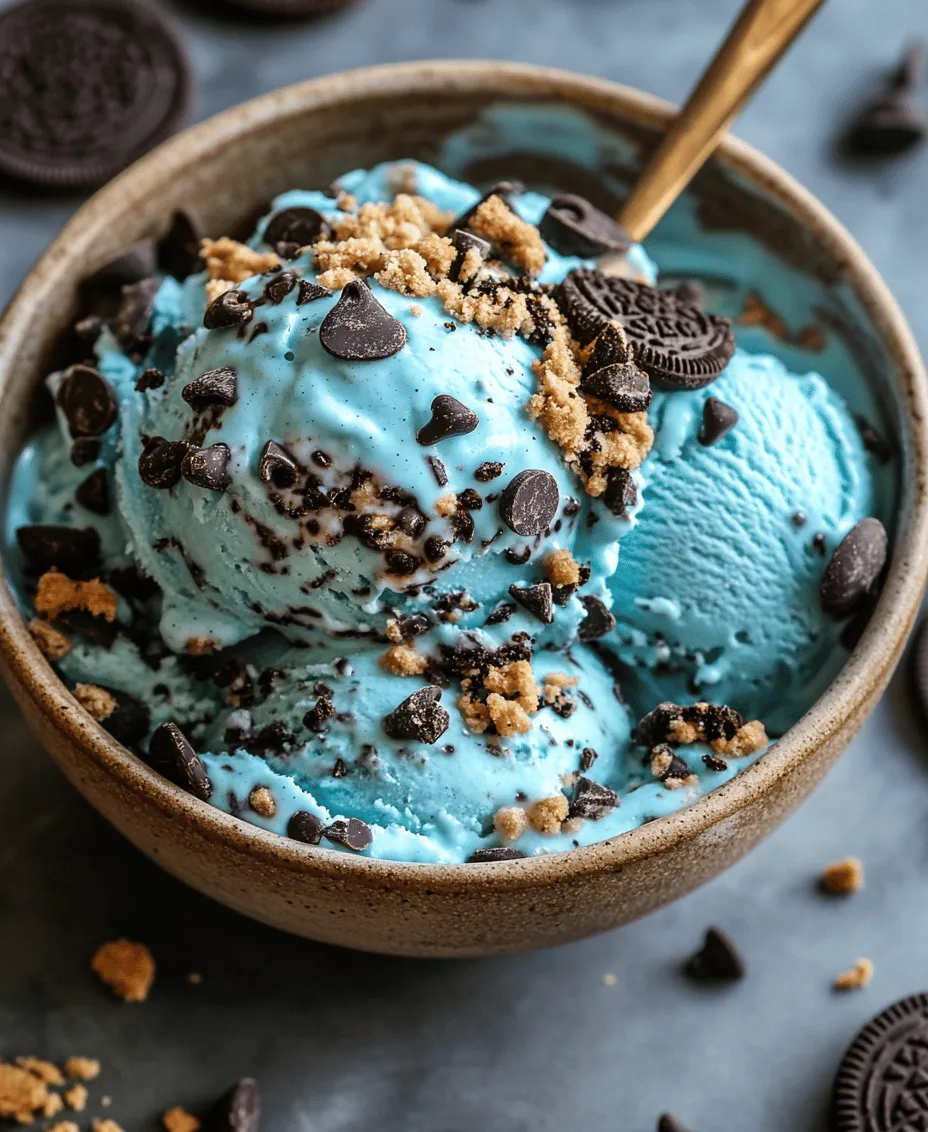
Visually, this ice cream is a feast for the eyes. The vibrant blue hue, achieved with food coloring, instantly draws attention, while the dark specks of cookie pieces and chocolate chips provide a beautiful contrast. This playful combination makes it an ideal dessert for parties, where it can become a centerpiece that sparks joy and conversation among guests.
Ingredients Breakdown
To recreate the delightful Cookie Monster Ice Cream, you’ll need a few key ingredients that come together to create its signature flavor and texture. Let’s break down each component and its unique contribution to this whimsical dessert:
– Heavy Cream: The foundation of any great ice cream, heavy cream provides the rich and creamy texture that makes each scoop a luxurious experience. Its high-fat content is essential for achieving that velvety mouthfeel that we all love in ice cream.
– Whole Milk: While heavy cream is crucial, whole milk plays a vital role in balancing the richness. It helps to create a lighter texture while still contributing to the overall creaminess. Using whole milk ensures that the ice cream remains smooth and easy to scoop.
– Granulated Sugar: Sugar is not just a sweetener; it also impacts the texture of the ice cream. It helps to lower the freezing point, ensuring that the ice cream remains scoopable and not rock hard. The right amount of sugar will enhance the flavors without making the ice cream overly sweet.
– Pure Vanilla Extract: This ingredient adds depth and complexity to the flavor profile. Vanilla enhances the overall sweetness and creates a beautiful harmony with the other ingredients. Always opt for pure vanilla extract for the best flavor.
– Blue Food Coloring: The star of the show, blue food coloring, is what gives Cookie Monster Ice Cream its signature hue. Achieving the perfect shade is crucial for that whimsical look. When adding food coloring, add a little at a time until you reach the desired vibrancy.
– Crushed Chocolate Chip Cookies: These cookies are not just for flavor; they add texture to the ice cream. The chunks of cookie will provide a delightful crunch and a familiar taste that complements the creamy base beautifully.
– Crushed Oreo Cookies: Adding Oreo cookies brings an extra layer of flavor and visual appeal. The chocolate cookies combined with the creamy filling create a rich flavor that pairs perfectly with the vanilla base.
– Chocolate Chips: For those who can’t get enough chocolate, adding chocolate chips takes this ice cream over the top. They provide additional chocolatey goodness and a delightful texture, making every bite an adventure.
Step-by-Step Instructions
Now that you have all your ingredients ready, it’s time to dive into the making of your Cookie Monster Ice Cream. Follow these clear, easy-to-follow instructions for the best results:
Preparing the Base Mixture
1. Combine Ingredients: In a large mixing bowl, combine the heavy cream, whole milk, granulated sugar, and pure vanilla extract. Use a whisk to mix these ingredients together thoroughly.
2. Whisk Until Smooth: Continue whisking until the sugar has completely dissolved. This step is crucial as undissolved sugar can lead to a gritty texture in your ice cream.
3. Add Food Coloring: Once your mixture is smooth, add the blue food coloring. Start with a few drops, and mix well. You can always add more if you want a more vibrant color, but it’s easier to add than to take away.
Churning Process
4. Transfer to Ice Cream Maker: Pour your prepared ice cream base into your ice cream maker. Follow the manufacturer’s instructions regarding the amount of mixture to add, as different machines have varying capacities.
5. Churn the Ice Cream: Start the machine and let it churn until the ice cream thickens and reaches a soft-serve consistency. This usually takes about 20-30 minutes, but be sure to check your machine’s instructions for specific timing.
6. Add Cookies and Chocolate Chips: During the last few minutes of churning, gently fold in the crushed chocolate chip cookies, crushed Oreo cookies, and chocolate chips. This ensures they are evenly distributed without breaking down too much.
7. Freeze for Firmness: Once churning is complete, transfer the ice cream to an airtight container. Smooth the top with a spatula, and press a piece of plastic wrap directly against the surface to prevent ice crystals from forming. Seal the container and freeze for at least 4 hours, or until firm.
By following these steps, you’re well on your way to creating a deliciously whimsical Cookie Monster Ice Cream that will delight anyone who encounters it. Get ready to scoop, serve, and enjoy the fun!
Folding in Cookies and Chocolate Chips
Once your ice cream base has been churned to a soft-serve consistency, it’s time to incorporate the star ingredients: the cookie crumbles and chocolate chips. This step is crucial for achieving that delicious Cookie Monster aesthetic, ensuring that every scoop is packed with flavor and texture.
To fold in your cookies and chocolate chips effectively, begin by transferring your churned ice cream into a large mixing bowl. It’s best to use a spatula for this step; the flexibility of a spatula allows for gentle movements that minimize air loss, preserving the airy texture you’ve worked hard to create.
1. Add the Mix-ins: Sprinkle your crushed cookies and chocolate chips over the surface of the ice cream in an even layer.
2. Folding Technique: With the spatula, start at the edge of the bowl and scoop down through the ice cream, then lift it and fold it over the top. Rotate the bowl a quarter turn and repeat this motion. The goal is to blend the mix-ins throughout without over-mixing, which can deflate the ice cream’s light texture.
3. Check for Even Distribution: As you fold, be sure to check that the cookies and chocolate chips are evenly distributed. You want to avoid clumps in one area and ensure that each bite is a delightful mix of creamy ice cream, crunchy cookies, and melty chocolate.
Freezing the Ice Cream
After folding in your cookies and chocolate chips, the next step is to freeze the ice cream to achieve the perfect firmness. Patience is vital here, as proper freezing ensures a creamy texture that isn’t too hard or icy.
1. Transfer to a Container: Use a freezer-safe container with a tight-fitting lid. An airtight container will help prevent ice crystals from forming, which can ruin the texture.
2. Spread Evenly: Once transferred, use a spatula to spread the ice cream evenly. Press it down slightly to eliminate any air pockets, which can result in uneven freezing.
3. Cover and Freeze: Seal the container tightly and place it in the coldest part of your freezer. Allow the ice cream to freeze for at least 4-6 hours, or overnight for best results. This time allows the flavors to meld together beautifully, enhancing the overall taste of your homemade treat.
Serving Suggestions
When it’s finally time to enjoy your Cookie Monster Ice Cream, the presentation can elevate the experience even further. Here are some creative serving ideas:
1. Bowl vs. Cone Presentation: While traditional scoops in a bowl are always a hit, consider serving your Cookie Monster Ice Cream in waffle cones for a nostalgic touch. The crunchy cone complements the creamy ice cream beautifully. For a fun twist, you can even dip the cone in melted chocolate and roll it in cookie crumbs before filling it with ice cream.
2. Optional Toppings: Enhance the flavor and texture by adding toppings. Extra cookie crumbles provide a delightful crunch, while a dollop of whipped cream adds a touch of decadence. Drizzle with chocolate syrup for an extra indulgent treat, or even consider a sprinkle of sea salt to enhance the sweetness.
3. Pairing Suggestions: Cookie Monster Ice Cream pairs wonderfully with various desserts and drinks. Consider serving it alongside warm chocolate brownies or a slice of rich chocolate cake. For drinks, a cold glass of milk or a rich espresso can complement the sweetness of the ice cream, creating a delightful balance.
The Joy of Homemade Ice Cream
Making Cookie Monster Ice Cream at home comes with numerous benefits that go beyond just the delicious end product.
1. Quality Control: When you make ice cream at home, you have complete control over the ingredients. This means you can choose high-quality dairy, avoid unwanted preservatives, and customize flavors to suit your preferences.
2. Customization: One of the most rewarding aspects of homemade ice cream is the ability to tailor it to your taste. Whether you prefer a sweeter ice cream or a more intense cookie flavor, you can adjust the recipe to create the perfect treat for yourself and your family.
3. Creating Memories: The process of making ice cream can also be a wonderful bonding experience with family and friends. Whether you’re teaching kids how to fold in the cookies or experimenting with flavors together, these moments can create lasting memories.
Customizing Your Cookie Monster Ice Cream
Feel free to play around with the basic Cookie Monster Ice Cream recipe to suit your taste. Here are some ideas for variations:
1. Different Cookie Combinations: Instead of standard chocolate chip cookies, try using peanut butter cookies or graham crackers for a unique twist. Each type of cookie can bring a different texture and flavor profile to your ice cream.
2. Alternative Mix-ins: Get creative with your mix-ins! Adding colorful sprinkles or candy pieces can not only enhance the visual appeal of your ice cream but also introduce new textures and flavors.
3. Adjusting Sweetness or Creaminess: If you prefer a less sweet ice cream, consider reducing the sugar content in your base. Alternatively, if you love a richer, creamier texture, increase the amount of heavy cream used in your recipe.
The Science Behind Ice Cream Making
Understanding the science behind ice cream making can help you achieve the best results every time.
1. Churning Process: The churning process is essential for creating smooth ice cream. As the ice cream mixture is churned, it incorporates air, which helps to create a light and creamy texture. This process also evenly distributes the flavor throughout the ice cream.
2. Role of Air Incorporation: The air that’s incorporated during churning expands as the ice cream freezes, contributing to a light texture. Too little air can result in dense, hard ice cream, while too much can lead to iciness.
3. Importance of Temperature: The temperature at which you freeze the ice cream is crucial. A rapid freeze will produce smaller ice crystals, resulting in a smoother texture. Keeping your ice cream at the right temperature during serving is equally important to maintain its creamy consistency.
Conclusion
Cookie Monster Ice Cream is not just a treat; it’s an experience filled with fun, creativity, and deliciousness. From the moment you mix the ingredients to the first delightful scoop, this homemade dessert brings joy to all ages. The satisfaction of creating something so indulgent from scratch, paired with the memories made during the process, makes it a recipe worth trying.
We encourage you to dive into this recipe and share it with your loved ones. Whether it’s a hot summer day or a cozy evening at home, Cookie Monster Ice Cream is sure to be a delightful addition to your dessert repertoire. So gather your ingredients, unleash your creativity, and enjoy the sweet rewards of homemade ice cream. It’s not just about the ice cream; it’s about creating moments of connection and celebration.