Introduction
Cinnamon rolls are a beloved treat that conjures images of cozy mornings, warm kitchens, and sweet indulgence. Their intoxicating aroma wafts through the air, making it nearly impossible to resist a warm, gooey roll freshly baked from the oven. While you can easily find these sweet pastries at bakeries and cafes, nothing beats the flavor and quality of homemade cinnamon rolls. Crafting your own allows you to control the ingredients, ensuring that every bite is as delectable as possible.
In this article, we aim to provide a comprehensive guide to making the best homemade cinnamon rolls. From understanding the history and variations of this delightful pastry to detailing the essential ingredients and providing step-by-step instructions, we will equip you with everything you need to create mouthwatering cinnamon rolls right in your kitchen.
Understanding Cinnamon Rolls
The history of cinnamon rolls is rich and varied, dating back centuries. While the exact origin is difficult to pinpoint, it is believed that these sweet treats originated in Northern Europe, with the earliest versions appearing in Sweden, where they are known as “kanelbullar.” These Swedish rolls are typically flavored with cardamom in addition to cinnamon, showcasing a unique twist on the classic recipe.
As cinnamon rolls spread across the globe, various cultures adapted them to their own tastes and traditions. In the United States, for example, the cinnamon roll became a staple of breakfast and brunch menus, often served with a decadent cream cheese frosting. Other variations can be found in countries like Norway, where they are enjoyed with a coffee break, and in Germany, known as “Zimtschnecken,” which translates to “cinnamon snails.”
Despite the many forms that cinnamon rolls take, one thing remains clear: homemade cinnamon rolls are superior to their store-bought counterparts. When you make cinnamon rolls from scratch, you can customize the flavor profile, control the ingredients, and ensure freshness. Homemade rolls tend to be softer, fluffier, and infinitely more satisfying than those that have been sitting on a store shelf.
Essential Ingredients for Perfect Cinnamon Rolls
To create the ultimate homemade cinnamon rolls, you’ll want to gather the following essential ingredients. Each component plays a crucial role in achieving that perfect texture and flavor.
All-Purpose Flour
All-purpose flour is the backbone of your cinnamon roll dough. It provides the necessary structure and gluten development to create soft, fluffy rolls. When measuring flour, be sure to spoon it into your measuring cup and level it off with a knife to avoid packing too much flour, which can lead to dense rolls.
Active Dry Yeast
Yeast is the leavening agent that makes your cinnamon rolls rise and become light and airy. Active dry yeast needs to be activated in warm water or milk before adding it to the dough. This process ensures that the yeast is alive and ready to work its magic during the fermentation process.
Granulated Sugar
Sugar serves multiple purposes in cinnamon roll dough. It not only adds sweetness but also helps to activate the yeast by providing it with the necessary food for fermentation. The sugar content in the dough contributes to a tender, flavorful roll.
Salt
Salt is an essential ingredient in baking, enhancing the overall flavor of your cinnamon rolls. It also plays a role in regulating yeast activity, ensuring that the dough rises at the right pace.
Whole Milk and Water
Using a combination of whole milk and water adds moisture to the dough, resulting in a softer texture. The warmth of the liquids helps to activate the yeast, making it more effective in the dough’s rise.
Unsalted Butter
Butter adds richness and flavor to your cinnamon rolls. It also contributes to the dough’s tenderness. Using unsalted butter allows you to control the salt level in your recipe, ensuring a balanced flavor.
Eggs
Eggs act as a binding agent, helping to hold the dough together while adding richness and flavor. They also contribute to the final texture of the rolls, making them light and fluffy.
Filling Ingredients
The filling is where the magic truly happens! You’ll need:
– Unsalted Butter: Softened butter is spread over the rolled-out dough, creating a rich base for the filling.
– Brown Sugar: This ingredient adds moisture and a deep caramel flavor that pairs perfectly with cinnamon.
– Cinnamon and Nutmeg: These spices create the signature flavor profile of cinnamon rolls, providing warmth and spiciness that complements the sweetness of the filling.
Frosting Ingredients
To finish off your cinnamon rolls, a delicious frosting is a must. The typical frosting includes:
– Cream Cheese: Adds a tangy flavor that balances the sweetness of the rolls.
– Powdered Sugar: Provides sweetness and a smooth texture, allowing for easy spreading over the warm rolls.
Step-by-Step Instructions for Making Cinnamon Rolls
Now that you have a solid understanding of the ingredients, it’s time to dive into the step-by-step process of making your homemade cinnamon rolls.
Preparing the Dough
1. Activate the Yeast: Start by warming your milk (or water) to about 110°F (43°C). This temperature is ideal for activating active dry yeast. In a small bowl, combine the warm milk with a teaspoon of sugar and the yeast. Let it sit for about 5–10 minutes until it becomes frothy. This indicates that the yeast is alive and ready to work.
2. Mix the Dry Ingredients: In a large mixing bowl, whisk together the all-purpose flour, granulated sugar, and salt. Make a well in the center of the dry mixture.
3. Combine Wet Ingredients: In a separate bowl, beat together the eggs and melted unsalted butter. Once the yeast mixture is frothy, add it to the wet ingredients.
4. Form the Dough: Pour the wet ingredients into the well of the dry ingredients. Using a wooden spoon or spatula, mix until a shaggy dough forms. At this point, don’t be alarmed if the dough feels sticky; this is normal.
Kneading the Dough
5. Knead the Dough: Transfer the dough to a lightly floured surface. Begin kneading the dough by folding it over itself and pushing it down with your palm. Rotate the dough a quarter turn and repeat the process. Knead for about 8-10 minutes until the dough is smooth and elastic. You can test the dough’s readiness by performing the “windowpane test”: stretch a small piece of dough between your fingers. If it stretches without tearing, it’s ready.
6. Let the Dough Rise: Lightly grease a large bowl and place your kneaded dough inside. Cover it with a clean kitchen towel or plastic wrap. Allow the dough to rise in a warm, draft-free area for about 1 to 1.5 hours, or until it has doubled in size.
With these initial steps, you are well on your way to creating the best homemade cinnamon rolls. The next sections will guide you through the filling process, baking, and frosting your rolls to perfection, ensuring a delightful end product that will impress family and friends alike. Stay tuned for the continuation of this delicious journey!
Making the Filling
Creating the perfect cinnamon filling is key to achieving that wonderfully sweet and spicy flavor profile that makes homemade cinnamon rolls irresistible. The filling primarily consists of three ingredients: brown sugar, ground cinnamon, and softened butter.
Techniques for Achieving the Perfect Cinnamon Filling Consistency
1. Soften the Butter: Ensure that your butter is at room temperature, which allows it to spread easily. If you forget to take it out of the fridge, you can soften it in the microwave for about 10 seconds. Be careful not to melt it; you want it soft but still firm.
2. Combine Ingredients: In a medium bowl, mix together 1 cup of brown sugar and 2 tablespoons of ground cinnamon. Use a whisk to ensure that the cinnamon is evenly distributed throughout the sugar, creating a uniform mixture.
3. Spread with Care: Once your dough has risen and is rolled out, spread the softened butter over the surface of the dough using an offset spatula or the back of a spoon. Make sure to cover the entire surface while leaving a small border along the edges to avoid spills when rolling.
Assembling the Rolls
Assembling the rolls is where the magic truly happens. The technique you use here will determine how well your rolls rise and how beautiful they look once baked.
Detailed Instructions on Rolling and Shaping the Dough
1. Roll Out the Dough: After your dough has risen, punch it down gently and turn it out onto a floured surface. Roll it into a rectangle, approximately 16×24 inches. The dough should be about ¼ inch thick for optimal rolling.
2. Apply the Filling: With the dough laid out, take your cinnamon filling and spread it evenly over the surface, ensuring you leave a 1-inch border all around. This border is crucial as it helps seal the roll and prevents the filling from spilling out while baking.
3. Tightly Roll the Dough: Starting from one of the longer edges, carefully roll the dough away from you, keeping it tight but not so tight that it tears. Use a bench scraper to help lift the dough if it sticks to the surface.
Importance of Leaving a Border When Spreading the Filling
Leaving a border when spreading your filling is essential. This prevents the filling from oozing out during the baking process, which can create a mess and lead to unevenly baked rolls. The border allows the dough to stick together as you roll it up, ensuring that each roll holds its shape as it rises.
Cutting and Arranging
Once you have your dough rolled up, it’s time to cut and arrange the rolls for the second rise.
Best Practices for Cutting Rolls Evenly for Uniform Baking
1. Use a Sharp Knife or Dental Floss: To achieve clean cuts, use a sharp serrated knife or unwaxed dental floss. If using a knife, gently saw through the dough without applying too much pressure. If using dental floss, slide it under the roll, cross the ends, and pull to cut.
2. Cut into Equal Sections: Aim for 12 equal pieces for standard-sized rolls. This ensures that they bake evenly. A good rule of thumb is to cut the log in half, then cut each half into six pieces.
Tips for Arranging Rolls for the Second Rise
1. Use a Baking Dish: Arrange your rolls in a greased baking dish, ensuring they are snug but not overcrowded. This helps them rise upward, creating soft, pillowy rolls.
2. Cover and Let Rise: Once arranged, cover the dish with plastic wrap or a clean kitchen towel and let the rolls rise in a warm place until they double in size. This usually takes about 30-45 minutes.
Baking
Now that your rolls have risen beautifully, it’s time to bake them to perfection.
Ideal Oven Temperature and How to Check for Doneness
1. Preheat Your Oven: Preheat your oven to 350°F (175°C). Proper preheating is crucial to ensure your rolls bake evenly.
2. Check for Doneness: Bake the rolls for 25-30 minutes, or until they are golden brown on top. You can also check doneness by tapping the bottom of a roll; it should sound hollow. Another method is to use a thermometer; the internal temperature should reach about 190°F (88°C).
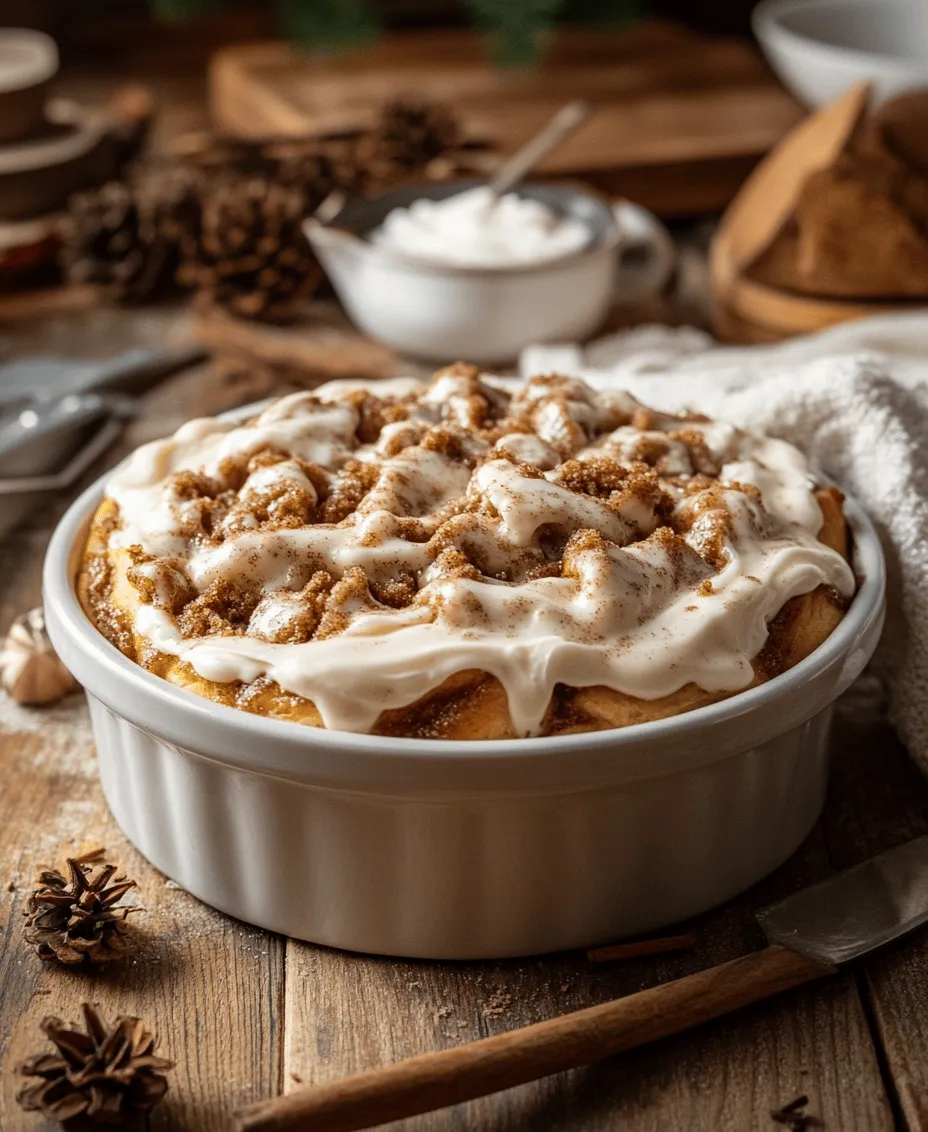
The Significance of Achieving a Golden-Brown Crust
Achieving a golden-brown crust is essential for both aesthetic appeal and flavor. A well-baked roll will have a crisp exterior that contrasts beautifully with the soft, fluffy interior. If your rolls are browning too quickly, you can cover them loosely with aluminum foil during the last few minutes of baking to prevent over-browning.
Creating the Frosting
While the rolls are baking, it’s the perfect time to prepare the frosting that will take your cinnamon rolls to the next level.
Mixing Techniques for a Smooth, Creamy Frosting
1. Combine Ingredients: In a medium bowl, mix together 4 oz of cream cheese (softened), 2 cups of powdered sugar, 1 teaspoon of vanilla extract, and 2 tablespoons of milk.
2. Use an Electric Mixer: For best results, use an electric mixer to combine the ingredients. Start on low speed to avoid a sugar cloud and then increase to medium until smooth and creamy.
Adjusting Consistency Based on Preference
If your frosting is too thick, add a little more milk, one tablespoon at a time, until you reach your desired consistency. Conversely, if it’s too thin, add more powdered sugar.
Flavor Variations for the Frosting
You can easily customize your frosting by adding different flavors. For a hint of spice, consider adding a pinch of nutmeg or a teaspoon of ground cinnamon. If you prefer a citrus twist, a few drops of lemon or orange extract can brighten the flavor profile.
Serving Suggestions and Pairings
Homemade cinnamon rolls are a delightful treat that can be enjoyed on various occasions.
Best Times and Occasions to Serve Homemade Cinnamon Rolls
These rolls are perfect for breakfast, brunch gatherings, or as a sweet afternoon snack. They’re especially popular during holidays and family celebrations, where the warm, comforting aroma fills the air, inviting everyone to gather around the table.
Pairing Ideas with Beverages
Cinnamon rolls pair beautifully with various beverages. Consider serving them with a hot cup of coffee for a classic breakfast combination. If you prefer tea, a spiced chai or herbal tea complements the cinnamon flavor well. For a fun twist, try pairing them with a glass of cold milk or even a warm spiced apple cider during the fall.
Presentation Tips for Serving Rolls to Guests
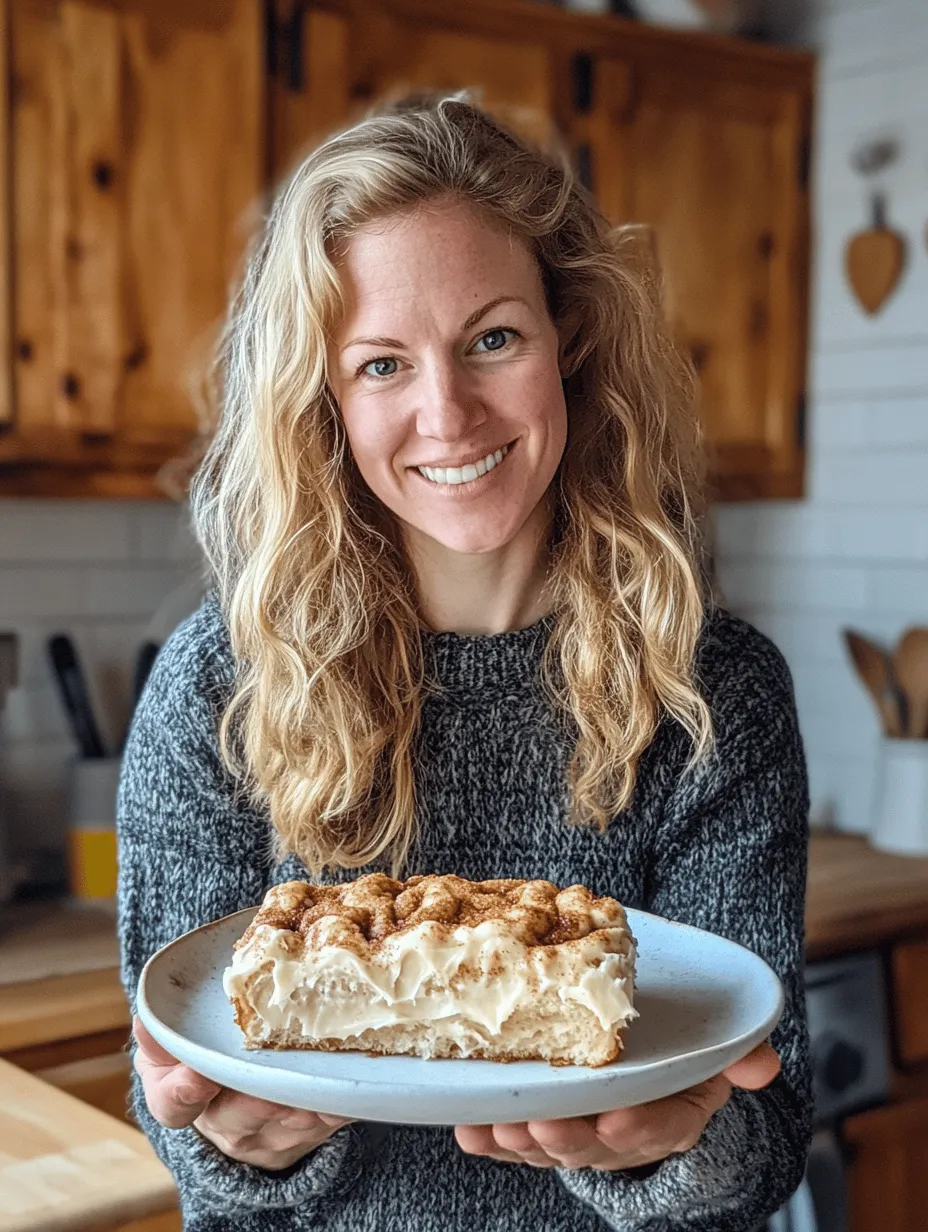
To impress your guests, serve your cinnamon rolls on a large platter or cake stand. Drizzle the frosting generously over the warm rolls for a visually appealing presentation. You can also garnish with a sprinkle of cinnamon or a few pecans for added texture and flavor.
Storing and Reheating Cinnamon Rolls
If you have leftover cinnamon rolls (though it’s hard to believe anyone could resist them), proper storage is essential to maintain their freshness.
Best Practices for Storing Leftover Rolls
Allow the rolls to cool completely before storing. Place them in an airtight container or wrap them tightly with plastic wrap. They can be stored at room temperature for up to 2 days or in the refrigerator for up to a week.
How to Reheat for Maintaining Softness and Flavor
To reheat, place the rolls in a microwave-safe dish and cover with a damp paper towel. Microwave in 10-15 second intervals until warmed through. Alternatively, you can reheat them in an oven set to 350°F (175°C) for about 10 minutes, ensuring they retain their soft texture.
Conclusion
There’s nothing quite like the joy of making homemade cinnamon rolls from scratch. The rich aroma of cinnamon and sugar wafting through your kitchen is a comforting experience that evokes cherished memories and brings loved ones together.
As you enjoy these delightful rolls, remember to share the recipe and your baking experience with friends and family. Encourage them to join in the fun of creating something delicious and heartwarming. The satisfaction of baking from scratch is not only about enjoying a treat but also about the memories created along the way. So roll up your sleeves, gather your ingredients, and dive into the delightful world of homemade cinnamon rolls!
