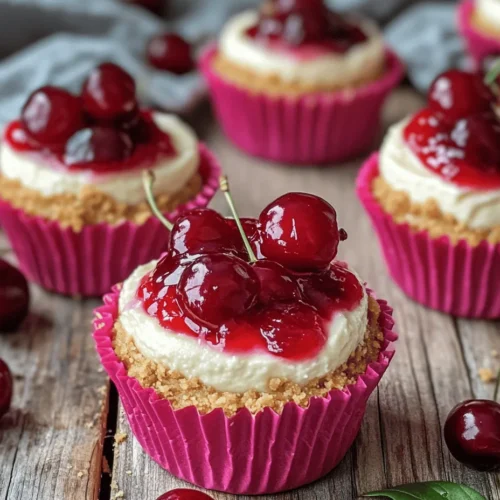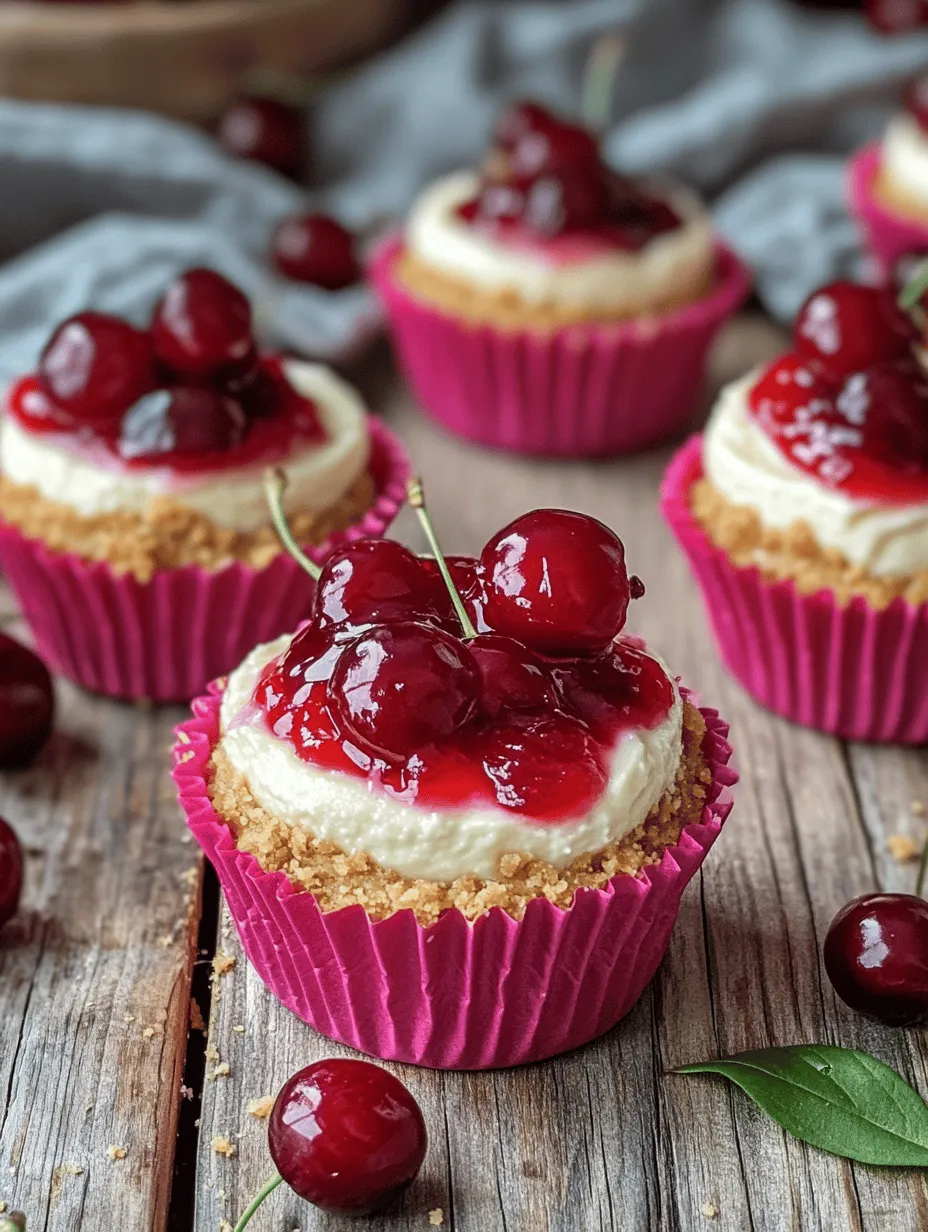
Indulging in dessert is one of life’s greatest pleasures, and if you’re a fan of sweet and savory combinations, these Mini Cherry Peanut Butter Cheesecakes are bound to become your new favorite treat. Imagine sinking your fork into a creamy, rich cheesecake that is infused with the comforting taste of peanut butter, topped with a vibrant cherry layer that adds a tart sweetness to every bite. These mini desserts not only offer a delightful flavor experience but also present beautifully, making them perfect for gatherings, parties, or even a personal indulgence after a long day.
In this article, we’ll explore the details of creating these delicious treats, breaking down the ingredients, instructions, and tips for achieving cheesecake perfection. Whether you’re a seasoned baker or a beginner in the kitchen, this recipe is designed to be straightforward and rewarding.
Understanding the Ingredients
When it comes to crafting the perfect Mini Cherry Peanut Butter Cheesecakes, understanding the role of each ingredient is vital. Each component contributes to the overall flavor, texture, and appearance of the cheesecake, ensuring your final product is nothing short of spectacular.
Overview of the Crust Ingredients
The foundation of any cheesecake is its crust, and for our mini versions, we’ll be using a simple yet delicious graham cracker crust. The ingredients for this crust are:
– Graham Cracker Crumbs: These provide that quintessential sweet and slightly crunchy base, which contrasts beautifully with the creamy filling.
– Sugar: A touch of granulated sugar enhances the sweetness of the crust, balancing the flavors of the cheesecake.
– Unsalted Butter: Melted butter binds the crumbs together, giving the crust a rich flavor and a sturdy structure.
Collectively, these three ingredients create a flavorful and sturdy base that supports the luscious cheesecake filling.
Breakdown of the Cheesecake Filling Ingredients
The heart of our Mini Cherry Peanut Butter Cheesecakes lies in the filling. Here’s what you will need to create this creamy delight:
– Cream Cheese: The star of the cheesecake filling, cream cheese provides the rich, creamy texture that cheesecakes are known for. It is essential that this is softened beforehand to ensure a smooth mixture.
– Peanut Butter: This is where the magic happens. Creamy peanut butter adds a nutty flavor that complements the sweetness of the cheesecake and the tartness of the cherry topping.
– Sugar: A bit of sugar is added here as well to sweeten the filling, balancing the flavors of the peanut butter and cream cheese.
– Eggs: Eggs are crucial in giving structure to the cheesecake. They help in achieving that perfect creamy texture and prevent the cheesecake from being too dense.
– Vanilla Extract: A splash of vanilla extract enhances the overall flavor profile, adding depth and warmth to the filling.
The Cherry Topping
No cheesecake is complete without a topping, and in this case, we have two delightful options for our cherry layer:
– Store-Bought Cherry Pie Filling: For those short on time, using a quality store-bought cherry pie filling is a quick and easy solution that still delivers on flavor.
– Homemade Cherry Topping: If you’re feeling adventurous, a homemade cherry topping is a fantastic way to showcase fresh cherries. This option allows for more control over the sweetness and texture of the topping.
Additionally, using fresh cherries for garnish adds a pop of color and freshness, elevating the presentation of your mini cheesecakes.
The Perfect Crust
Creating a strong foundation for your cheesecakes is essential for both structure and flavor. The crust not only provides a base for the filling but also adds texture and taste that enhances the overall dessert experience.
Importance of the Crust in Cheesecakes
The crust plays a crucial role in cheesecakes, acting as the sturdy base that holds the creamy filling. A well-prepared crust prevents the filling from leaking and maintains the integrity of each mini cheesecake. It also contributes to the flavor, offering a sweet, buttery crunch that pairs perfectly with the smoothness of the cheesecake.
Step-by-Step Guide to Preparing the Graham Cracker Crust
1. Preheat Your Oven: Begin by preheating your oven to 325°F (163°C). This ensures that your crust will bake evenly, resulting in a perfectly crisp texture.
2. Combine Ingredients: In a mixing bowl, combine 1 cup of graham cracker crumbs, 2 tablespoons of granulated sugar, and 5 tablespoons of melted unsalted butter. Mix until the crumbs are evenly coated and the mixture resembles wet sand.
3. Press into Muffin Tins: Line a muffin tin with paper liners for easy removal. Using the back of a spoon or your fingers, press the crumb mixture firmly into the bottom of each muffin cup to form a solid layer. Make sure to pack it tightly to prevent the crust from crumbling when removed.
4. Bake the Crust: Place the muffin tin in the preheated oven and bake for about 8-10 minutes, or until the crust is lightly golden and fragrant. Allow it to cool while you prepare the cheesecake filling.
Tips for Achieving the Right Texture and Consistency
– Use Fresh Ingredients: For the best flavor, ensure your ingredients are fresh. Stale graham crackers or old butter can affect the taste of your crust.
– Don’t Overmix: When combining the crust ingredients, mix just until combined. Overmixing can lead to a dense crust that lacks the desired texture.
– Pack Tightly: Make sure to press the crust mixture firmly into the muffin tin. This will help it hold together when baked and make it easier to remove the mini cheesecakes later.
Crafting the Cheesecake Filling
Once your crust is prepared and cooled, it’s time to focus on crafting the cheesecake filling. Getting this part right is essential for achieving that ideal creamy texture that everyone loves.
Techniques for Softening Cream Cheese Properly
To ensure a smooth filling, it’s important to soften the cream cheese correctly. Here’s how:
– Room Temperature: Allow the cream cheese to sit at room temperature for at least 30 minutes before using it. This will make it easier to blend smoothly.
– Microwave Method: If you’re short on time, you can microwave the cream cheese for about 10-15 seconds. Just be cautious not to melt it, as you want it soft, not liquid.
Mixing Methods for Incorporating Peanut Butter and Sugar
1. Blend Cream Cheese: In a large mixing bowl, combine the softened cream cheese with 1/2 cup of granulated sugar. Using an electric mixer, beat the mixture on medium speed until smooth and creamy, about 1-2 minutes.
2. Add Peanut Butter: Next, add 1/2 cup of creamy peanut butter to the mixture. Continue to beat until fully integrated, ensuring there are no lumps remaining.
3. Incorporate Eggs: Add in 2 large eggs, one at a time, mixing well after each addition. This process helps to incorporate air into the filling, resulting in a lighter texture.
4. Finish with Vanilla: Finally, mix in 1 teaspoon of vanilla extract, ensuring it is evenly distributed throughout the filling.
The Role of Eggs in Achieving the Perfect Cheesecake Texture
Eggs are key to the structure and texture of your cheesecake. They provide stability and moisture, helping the filling to set properly while maintaining a creamy consistency. Overbaking the cheesecake, however, can cause the eggs to dry out the filling, so it’s important to keep an eye on the baking time.
Importance of Vanilla Extract in Enhancing Flavor
Vanilla extract is a flavor enhancer that rounds out the taste of your cheesecake. It adds warmth and depth, ensuring that the flavor of the peanut butter and cream cheese shines through without being overpowering. Always opt for pure vanilla extract for the best results.
Baking the Mini Cheesecakes
Now that you have your crust and filling prepared, it’s time to bake your mini cheesecakes. This step is crucial for achieving the right texture and ensuring your cheesecakes set beautifully.
Key Steps to Ensure Success
1. Preheat Your Oven: Ensure your oven is still preheated to 325°F (163°C). A consistent temperature is essential for even baking.
2. Fill the Crusts: Carefully spoon the cheesecake filling into each muffin cup over the pre-baked crust, filling each one about 3/4 full. This allows room for the cheesecakes to rise slightly during baking.
3. Bake: Place the muffin tin back in the oven and bake for approximately 18-20 minutes. The cheesecakes should be set around the edges but still slightly jiggly in the center.
4. Cool Gradually: Once baked, turn off the oven and leave the cheesecakes inside with the door ajar for about 10 minutes. This gradual cooling helps prevent cracks from forming on the surface.
5. Chill: After cooling in the oven, remove the cheesecakes and let them cool at room temperature for an additional 30 minutes. Then, refrigerate them for at least 2 hours (or overnight) before serving. Chilling not only enhances the flavor but also helps the cheesecakes firm up for easier slicing.
With these detailed steps and tips, you’re well on your way to creating the ultimate Mini Cherry Peanut Butter Cheesecakes. Stay tuned for the next part of the article, where we will dive deeper into assembling these delightful desserts, topping them with cherries, and answering some common questions about the recipe.

Preheating the Oven and Preparing the Muffin Pan
To achieve perfectly baked Mini Cherry Peanut Butter Cheesecakes, start by preheating your oven to 325°F (160°C). This temperature is ideal for gentle baking, allowing the cheesecakes to set without cracking. While the oven warms up, prepare your muffin pan by lining it with paper liners or greasing it well with non-stick cooking spray. Using liners not only makes for easier removal but also adds a decorative touch to your presentation.
Once your pan is ready, ensure that all your ingredients are at room temperature. This step is crucial for creating a smooth and creamy cheesecake filling. Cold ingredients can lead to a lumpy texture, which we want to avoid.
Layering the Cheesecake Filling Over the Crust
With your crust baked and cooled, it’s time to layer the rich cheesecake filling over it. In a mixing bowl, combine the room-temperature cream cheese, peanut butter, sugar, and vanilla extract. Beat the mixture on medium speed until it becomes light and fluffy, ensuring there are no lumps. This process typically takes about 3-5 minutes.
Next, add the eggs one at a time, mixing thoroughly after each addition. Be careful not to overmix; you want the mixture to be well combined but still light. Once the filling is smooth, spoon it evenly over the pre-baked crusts in your muffin pan, filling each liner about three-quarters full. This step allows room for the cheesecakes to rise slightly during baking.
Understanding the Baking Process: How to Know When They Are Done
Baking times can vary depending on your oven, so it’s essential to keep an eye on your mini cheesecakes. Bake them for approximately 20-25 minutes, or until the edges look set but the center remains slightly jiggly. This slight jiggle is a good sign—they will continue to firm up while cooling.
For the best results, use an oven thermometer to ensure your oven is accurately calibrated, as an oven that is too hot can lead to cracks in your cheesecakes. Once they are done, remove them from the oven and let them cool in the pan for about 10 minutes before transferring them to a wire rack to cool completely.
The Significance of Cooling and Chilling for Flavor Development
After your cheesecakes have cooled at room temperature, it’s time for the crucial chilling step. Transfer them to the refrigerator and allow them to chill for at least 4 hours, although overnight is ideal. This chilling process not only enhances the flavor development of the cheesecake but also improves its texture, making it creamy and decadent.
Chilling also helps the flavors meld together, allowing the peanut butter and cream cheese to balance beautifully with the sweetness of the cherry topping. Resist the temptation to skip this step; the wait is well worth it!
Cherry Topping: The Final Touch
The cherry topping is what truly elevates your Mini Cherry Peanut Butter Cheesecakes. You have two main options for the topping: store-bought cherry pie filling or homemade cherry sauce.
Understanding the Choice Between Store-Bought and Homemade Cherry Pie Filling
Store-bought cherry pie filling is a convenient option that saves time, but making your own cherry topping allows for greater control over sweetness and flavor. If you choose to make your own, simply cook fresh or frozen cherries with sugar and a splash of lemon juice until they break down and thicken.
If you decide to use store-bought filling, look for a high-quality brand that uses real fruit and minimal additives. You want a topping that complements your cheesecake without overpowering it.
Techniques for Applying the Cherry Topping Without Making a Mess
When it comes to applying the cherry topping, less is usually more. Use a spoon to carefully dollop the filling onto each cheesecake, allowing it to spread naturally. This technique helps to avoid messy drips and keeps the presentation neat.
If you’re using homemade sauce, you can drizzle it gently over the top for a more artistic look. Ensure that the cheesecakes are fully chilled before adding the topping to prevent it from sliding off.
How Fresh Cherries Can Enhance the Presentation and Flavor Profile
For an extra touch of elegance, consider garnishing your cheesecakes with fresh cherries. Simply halve the cherries and place them on top of the cheesecakes before serving. Not only do fresh cherries enhance the visual appeal, but they also add a burst of freshness that complements the rich and creamy cheesecake.
Serving Suggestions and Presentation Ideas
Making Your Cheesecakes Shine
Once your Mini Cherry Peanut Butter Cheesecakes are fully assembled and garnished, it’s time to think about serving them. Presentation plays a significant role in elevating your dessert experience.
Ideas for Garnishing and Serving the Mini Cheesecakes
Beyond the cherry topping, consider adding a sprinkle of crushed peanuts or a drizzle of chocolate sauce for added flavor and texture. You can also dust the cheesecakes with powdered sugar for a touch of sweetness and elegance.
Serving the cheesecakes on a decorative platter or individual dessert plates can create an inviting display. You might want to pair them with a dollop of whipped cream or a scoop of vanilla ice cream on the side for a decadent touch.
Pairing Suggestions for Beverages That Complement the Dessert
To elevate your dessert experience further, consider pairing your Mini Cherry Peanut Butter Cheesecakes with a complementary beverage. A light, fruity white wine or sparkling water infused with lemon or mint can enhance the dessert’s flavors. For coffee lovers, a rich, dark roast coffee or a creamy latte can provide a nice contrast to the sweetness of the cheesecake.
Creative Plating Ideas for Special Occasions and Gatherings
For special occasions, consider creating a dessert station where guests can customize their cheesecakes with various toppings like chocolate shavings, whipped cream, or even crushed graham crackers. Use tiered cake stands to display the cheesecakes at varying heights, making the presentation even more enticing.
Nutritional Information
Understanding the Ingredients’ Impact on Diet
When indulging in desserts, it’s essential to be aware of the nutritional content. Each Mini Cherry Peanut Butter Cheesecake typically contains approximately 150-200 calories, depending on the specific ingredients used.
Overview of the Nutritional Content Per Serving
– Calories: 150-200 per cheesecake
– Fat: 10g (mostly from peanut butter and cream cheese)
– Carbohydrates: 15g (from the crust and filling)
– Protein: 4g (from the cream cheese and peanut butter)
– Fiber: 1g (from the crust and cherries)
Discussion on Dietary Considerations (Caloric Content, Allergens)
Keep in mind that these cheesecakes contain allergens such as peanuts, dairy, and gluten (if using regular graham crackers). For gluten-free variations, consider using gluten-free graham crackers or alternative crust options.
If you’re looking to reduce calories or make the recipe healthier while maintaining flavor, consider using reduced-fat cream cheese or a sugar substitute. Adjusting the peanut butter to a natural, unsweetened version can also enhance the health profile without sacrificing taste.
Conclusion
Mini Cherry Peanut Butter Cheesecakes are not just another dessert; they are a culinary experience that marries sweet and savory in perfect harmony. Whether you are baking for a crowd or treating yourself, these mini treats are sure to impress. With a simple yet effective recipe, anyone can create these delightful cheesecakes that are as pleasing to the eye as they are to the palate. Embrace the joy of baking, and let these cheesecakes become a staple in your dessert repertoire. With their rich flavor, beautiful presentation, and versatile serving options, they are perfect for any occasion or gathering. Enjoy every bite of your delicious creation!